Locking systems for lockers
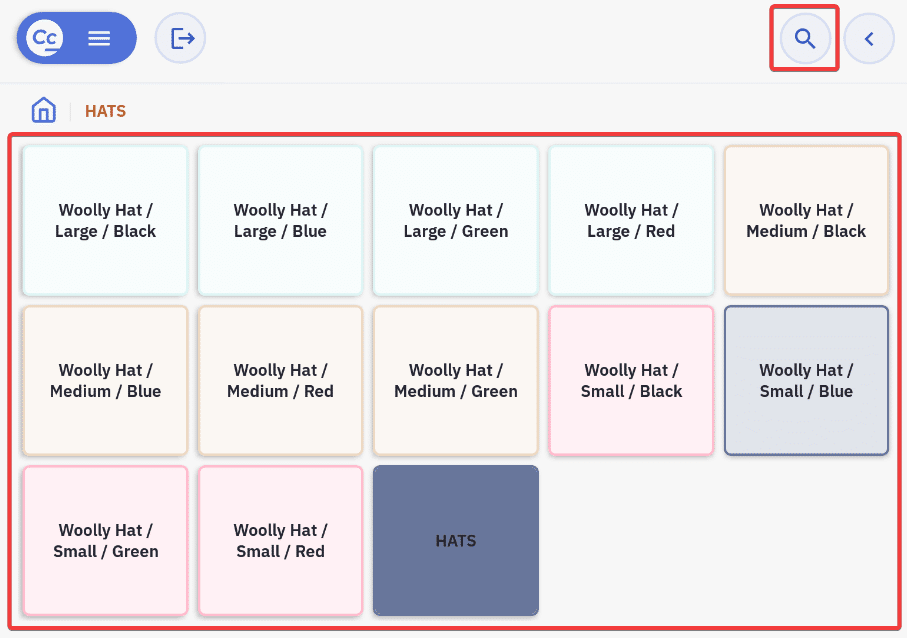
 After logging in and opening a shift the sales view will be opened. Top row consists of multiple action buttons, on the left is space for POS product/group buttons, invoice rows will be displayed on the right.
1 – Options
2 – Button to log out
3 – Product search by name
4 – Change invoice view
5 – See open invoices
6 – Add a client to the invoice
7 – Additional invoice settings

Adding products to an invoice
Products can be added to an invoice either by clicking buttons created on the office side, using the Product search by name button or scanning the barcode of a product using a barcode scanner.
Invoice row actions
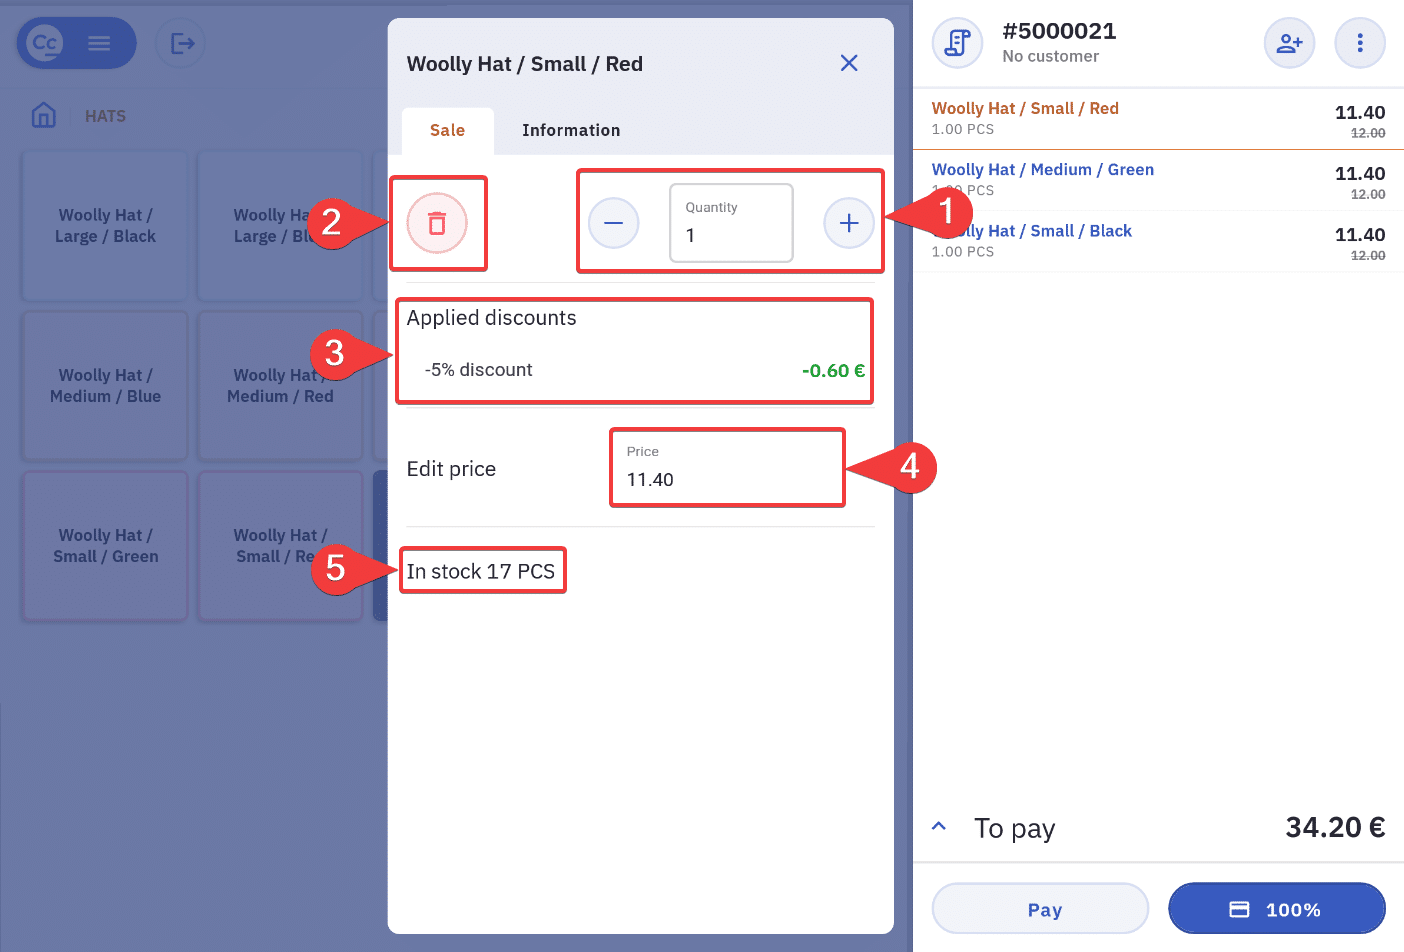
Clicking on the invoice row brings up multiple options for it.
1 – Field to adjust the quantity
2 – Button to delete the product row
3 – Info regarding applied discounts
4 – Field to edit price for the row
5 – Amount in inventory
Clients / Loyalty cards
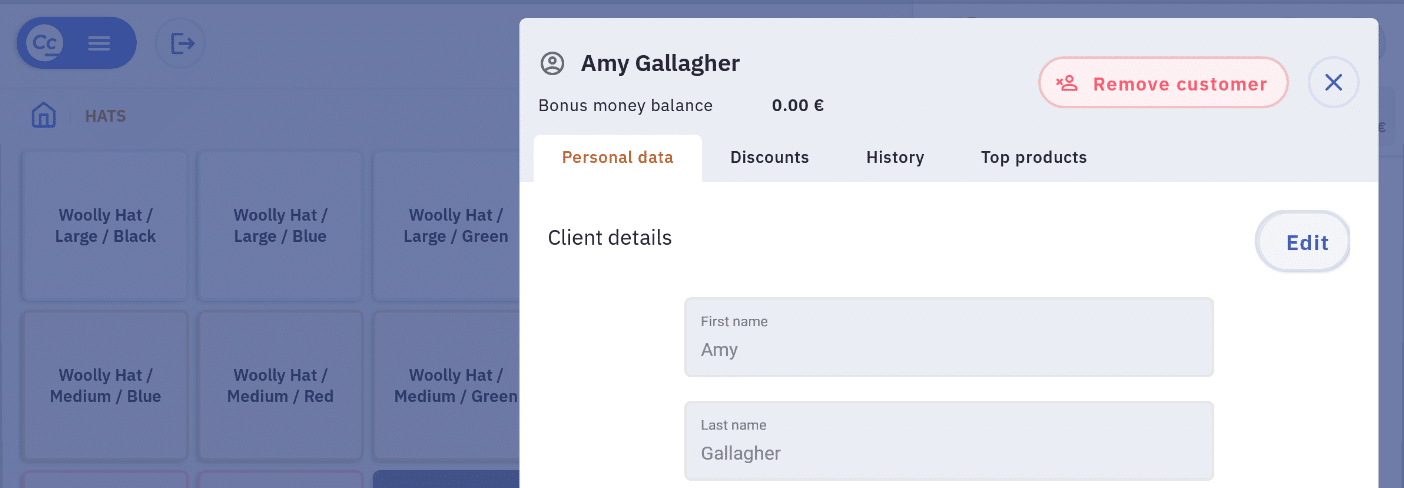
Clients and loyalty cards for the invoice can be managed by clicking the Client button.
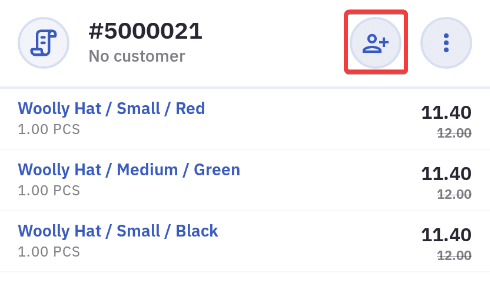
Existing clients can be added by searching for them and clicking Select client button. When configured clicking Read card will prompt the user to enter the client card into the terminal. New clients, both private and business can be added by clicking Add new client.

After the client has been added to an invoice clicking the Client button again displays information about the client added. By clicking Edit the details can also be modified.
Applying a discount
Discounts can be added by clicking Additional invoice settings and then clicking Add discount.

Registering payments
To close an invoice a payment has to be registered. A payment can be registered in Retail POS app by clicking either the Card payment(1) button to quickly register a bank card payment or the Pay(2) button for any other payment method.
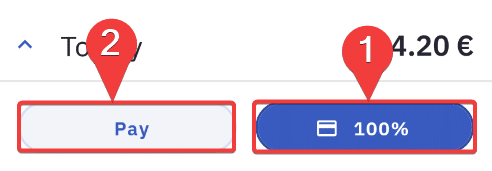
Clicking the Pay button will open up an additional menu where the payment method can be selected, and the sum inserted. When the amount received is greater than the invoice total the program will display the change amount. From this window it’s also possible to send the receipt to the customer via e-mail.