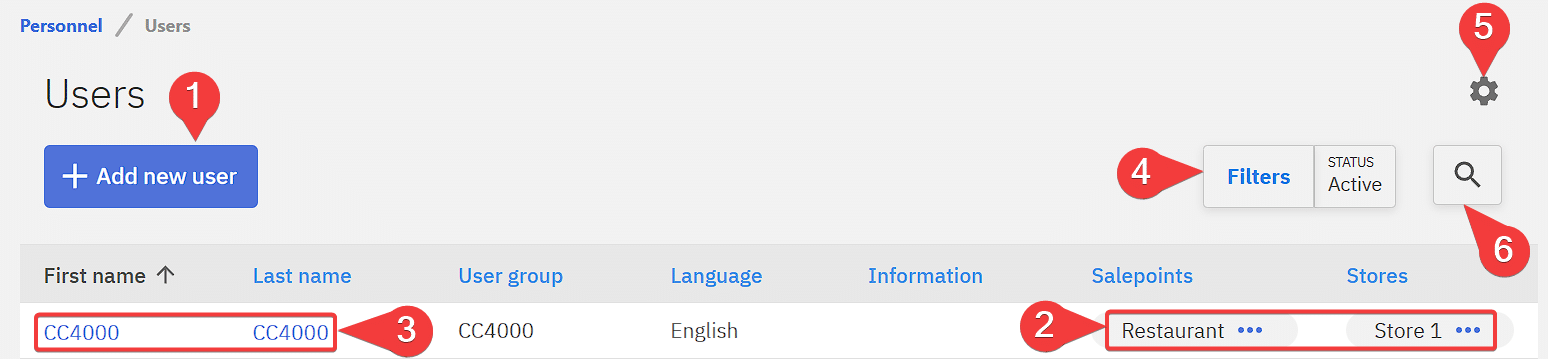
Users
Users for both office and POS can be managed under Personnel and Users.
1 – Button to add a new user
2 – Active salepoints/stores for the user can be seen when hovering on
3 – By clicking on either the first name or last name the user can be edited
4 – Filter to show deactivated users or filter by active sale point
5 – Option to edit the layout of the user list
6 – Search to find users by name
Adding a new user
1 – First name, will be printed on the invoice
2 – Last name, will be printed on the invoice
3 – POS password, used to log into the POS, it’s recommended to use only numbers
4 – Active toggle, when inactive users will be unable to use the program
5 – User group will specify which actions the user will be able to perform
6 – Selects in which language will the programs be displayed for the user
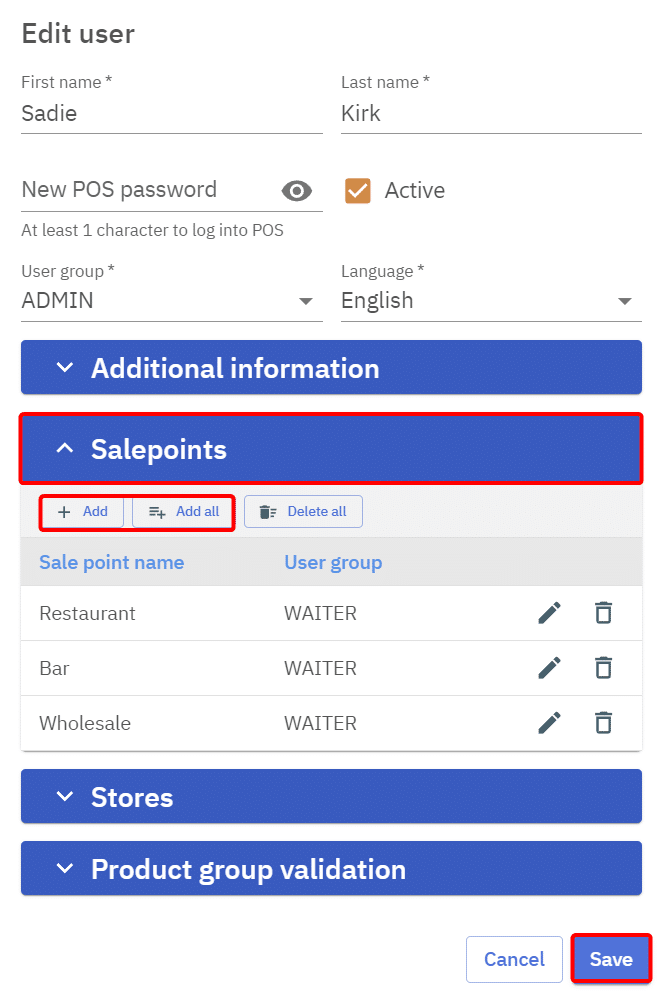
7 – Option to add a salepoint
8 – Option to add all salepoints
9 – Option to delete all salepoints from user
10 – Button to edit the user group in a selected sale point
11 – Button to remove a sale point for the user
12 – Default store, determines which store will be automatically selected when the user logs in
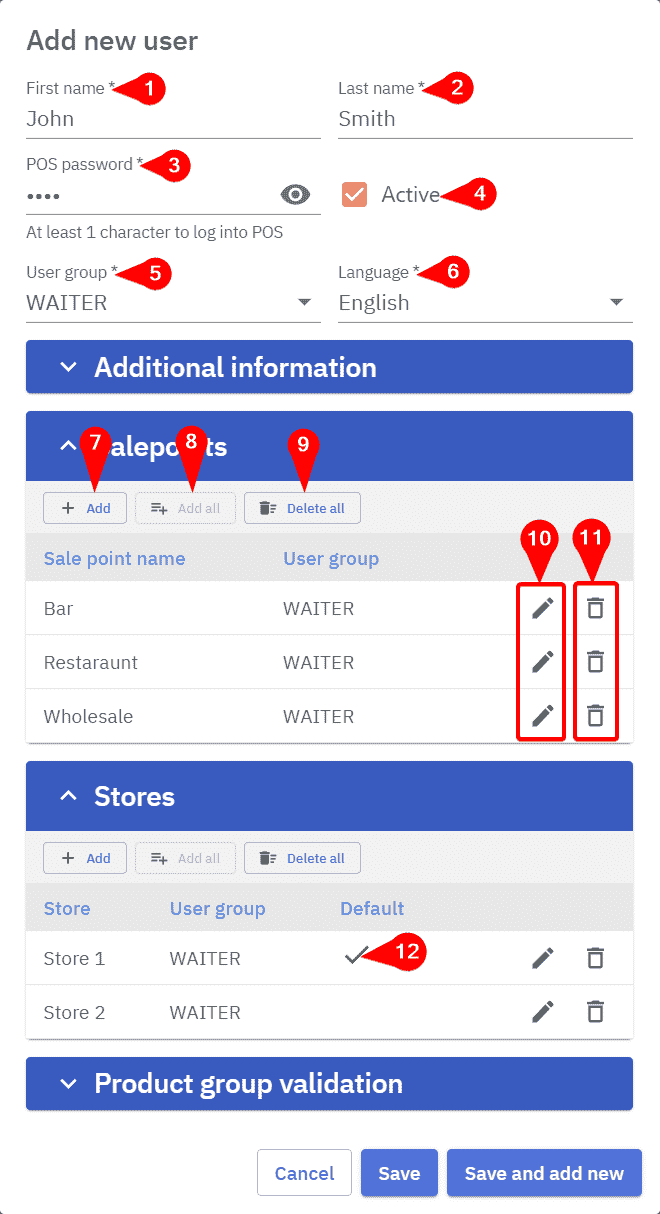
When creating a POS user it should be made sure that the user has the sale point the POS is under, added to the user, otherwise logging in will display an error message.
Adding a web office license
Web office users are license based, additional licenses can be added in by going Settings and Licenses and modules.
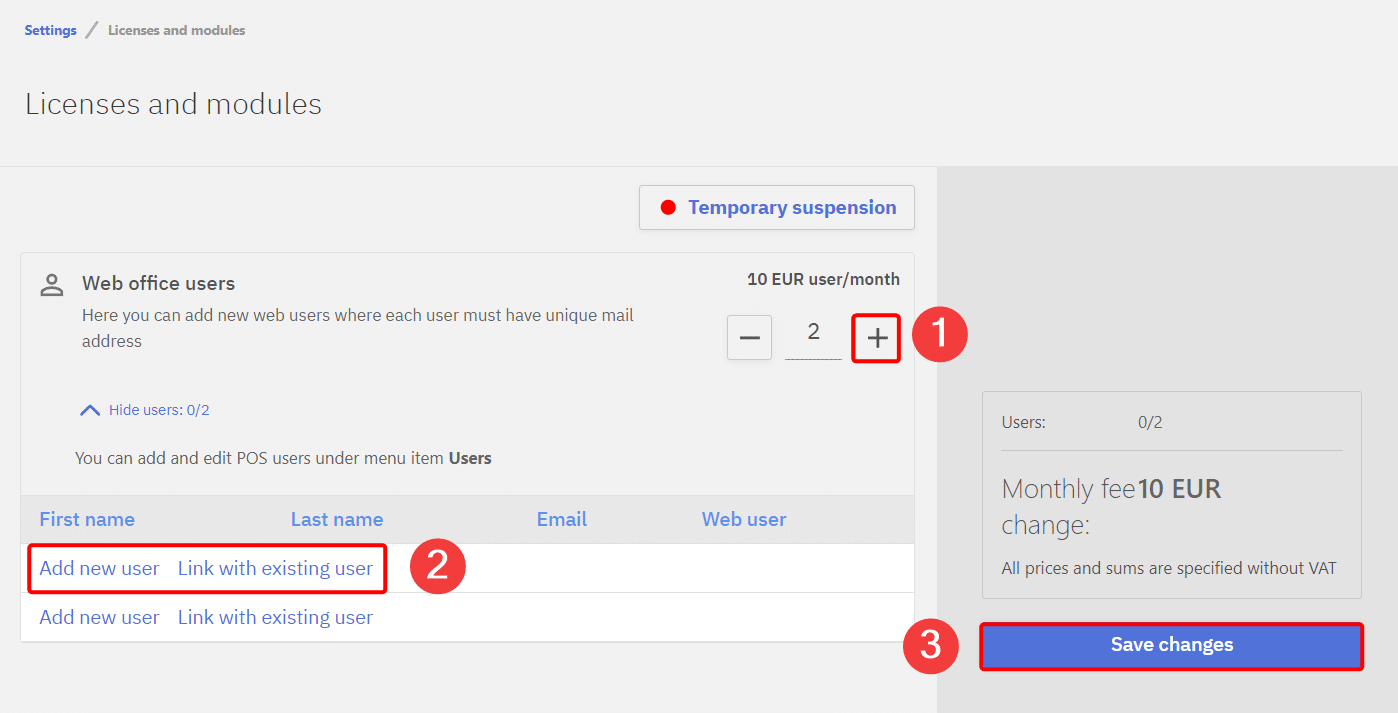
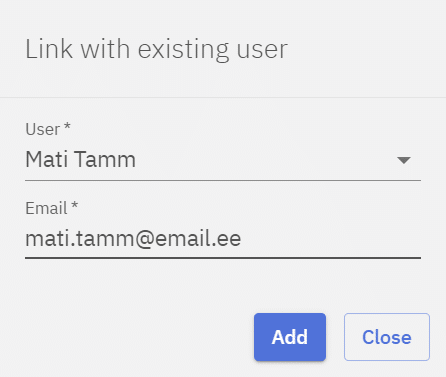
Unused licenses can be linked with existing accounts, select the user and insert the e-mail.
By clicking Save changes a confirmation e-mail will be sent to the user.
FAQ – Frequently asked questions
Adding a sale point to a user
When a new sale point is added it must also be added for users, otherwise they will not be able to log into the POS at that sale point, also they will be unable to see sales/invoices in the office and configure settings related to the sale point.
Sale point can be added by going to Personnel and Users.
First, click on the name of the user to who we’ll want to add the sale point.
Inside the Salepoint tab, click Add/Add all and Save.
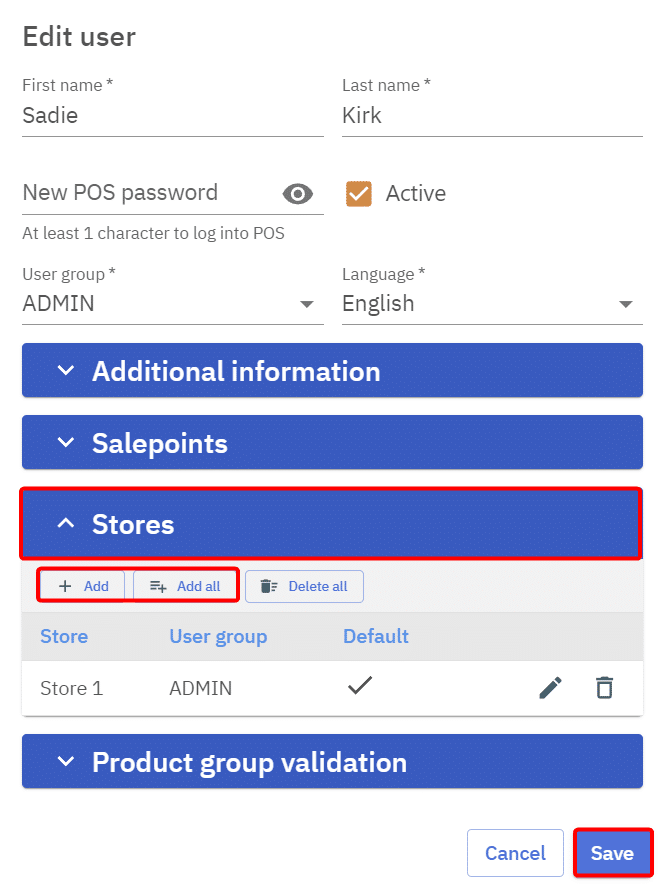
Adding a store to a user
When a new store is added it must also be added for users, otherwise they will not be able see reports for that store or insert purchase invoices or do inventory count.
Store can be added by going to Personnel and Users.
First, click on the name of the user to who we’ll want to add the Store.
Inside the Store tab, click Add/Add all and Save.