Locking systems for lockers
 Both business and private customers are listed and can be managed under Customers and Customers.
Private clients – customers who use loyalty cards to get discounts for invoices, collect bonus from purchases and use prepaid client cards in the POS, usually people
Business clients – customers who pay invoices by bank transfer and receive wholesale invoices through the office program, usually companies
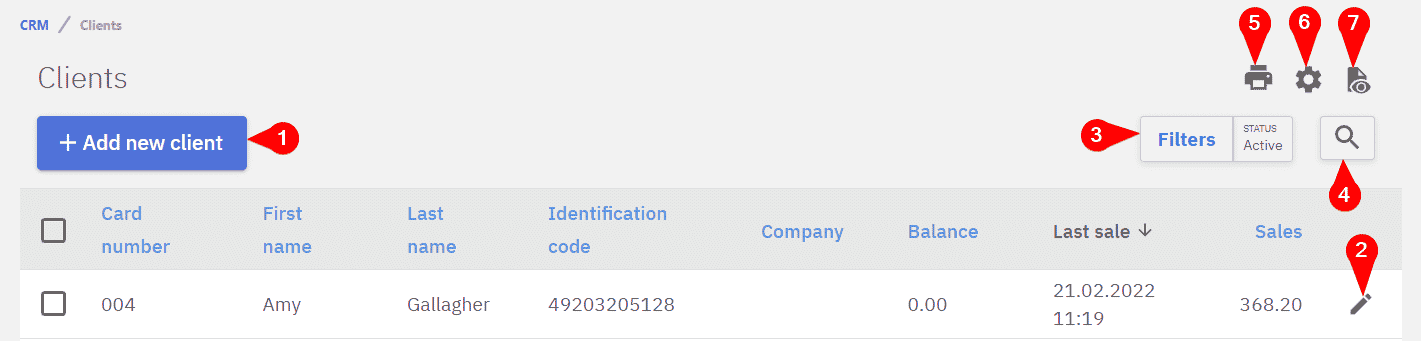
1 – Button to add a new client
2 – Edit button to edit an already existing client
3 – Filters to filter client cards
4 – Search button for finding clients by name
5 – Printing option to either print or save the filtered client list to file
6 – Layout editor to change the order or hide irrelevant columns
7 – Option to save a new layout or open an already saved layout for client list
Filtering clients
Compucash allows to extensively filter clients, filtering can be accessed under Filters.

Adding a new client
Both new business and private clients are added under Add new client.
Private clients
Private clients can be added when selecting Private client on new client selection.
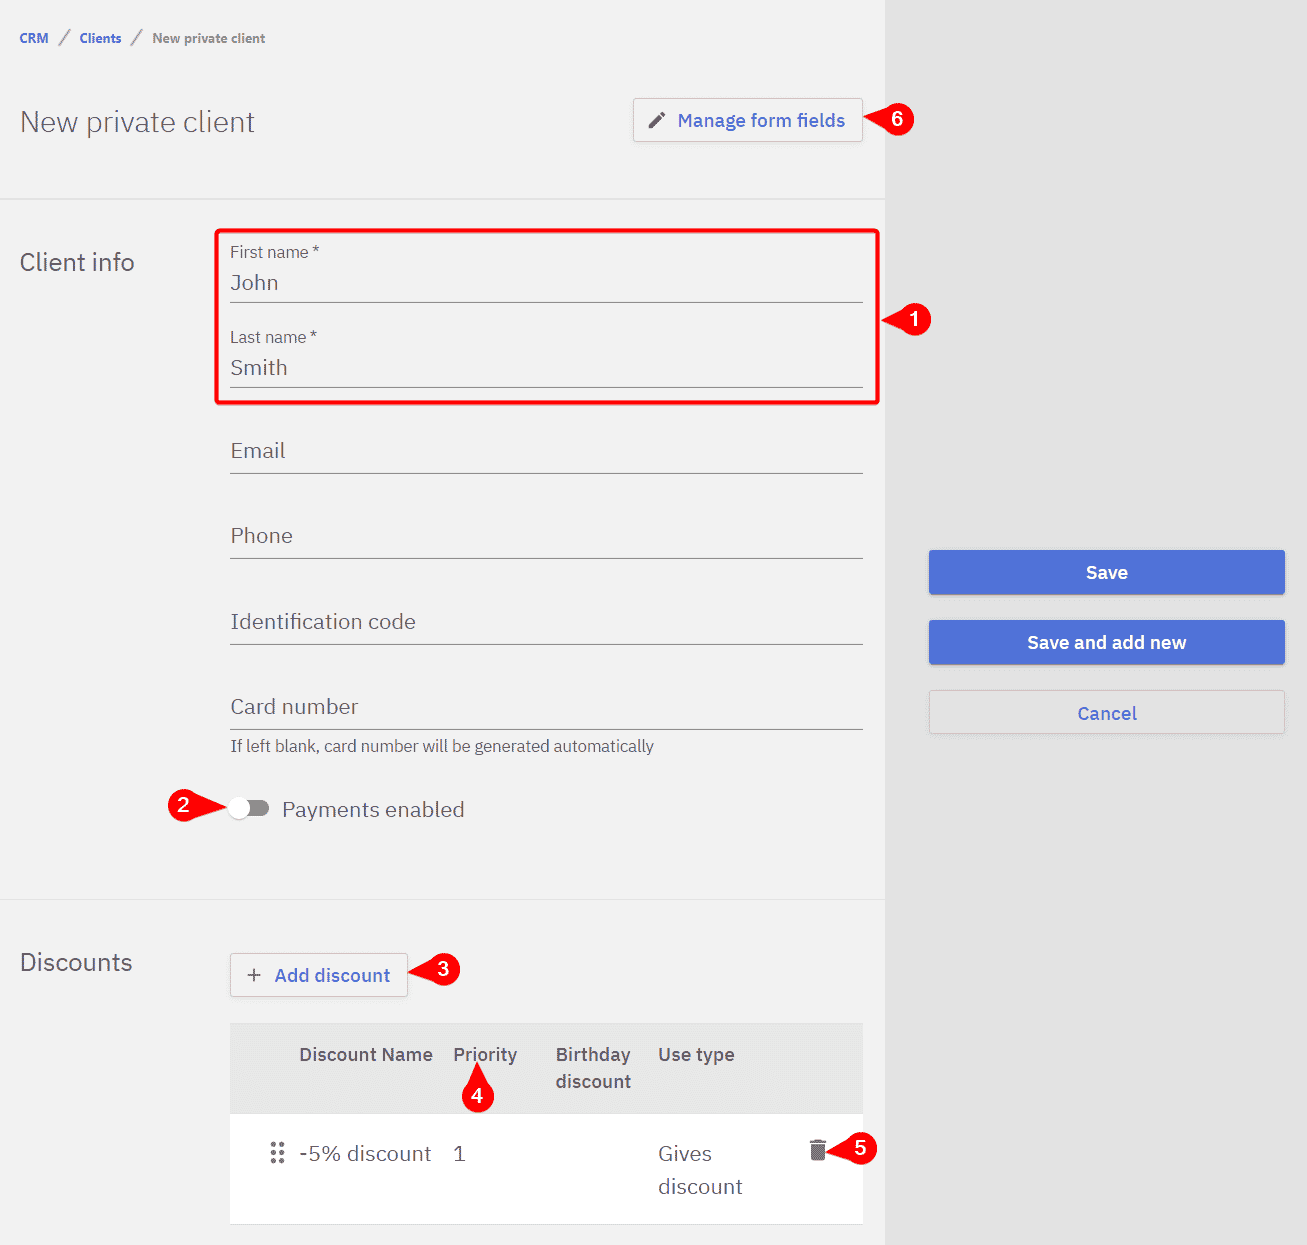
1 – Mandatory fields for a private client loyalty card
2 – Payment toggle for a loyalty card, if on the card will act as a credit card
3 – Button for adding a discount, discount can be selected when clicked on
4 – Priority of the discount, lower number priority discounts will be processed before. Birthday discounts should have the highest priority.
5 – Button to delete a discount from a loyalty card
6 – Form field editor
Even though private clients can be added through the office they’re usually added through the POS.
Business clients
Business clients can be any clients who pay by bank transfer, meaning if a private customer wanted to pay by bank transfer they’d have to be added also as a business client.
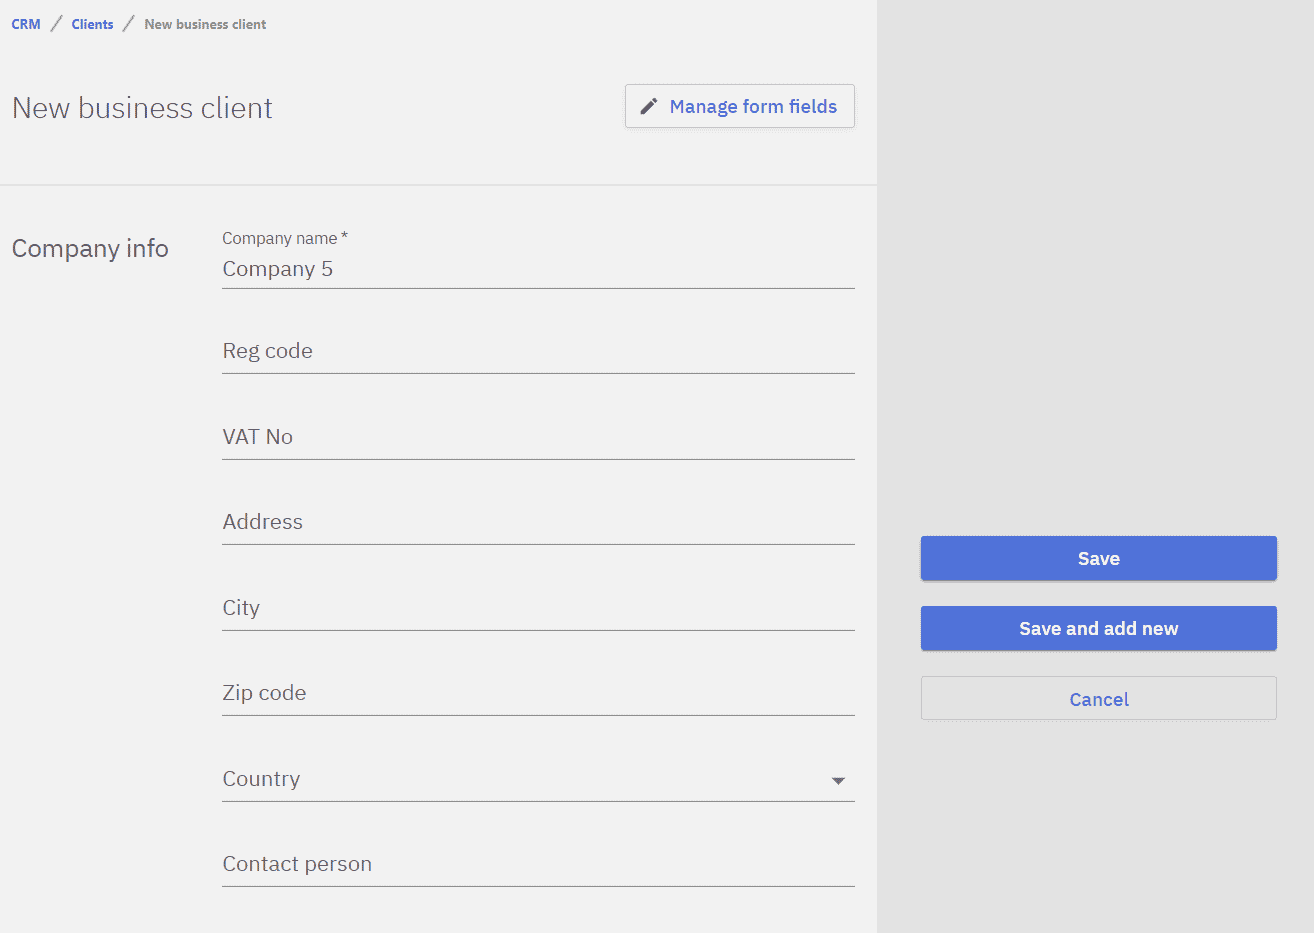
Business clients can be added when selecting Business client on new client selection.
When creating a new business client the Company name is the only mandatory field.
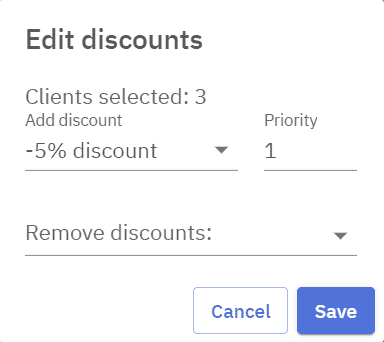
Editing discounts for multiple clients
All clients filtered clients can be selected by clicking the multi select button(1), when any clients are selected Edit discounts(2) becomes visible.
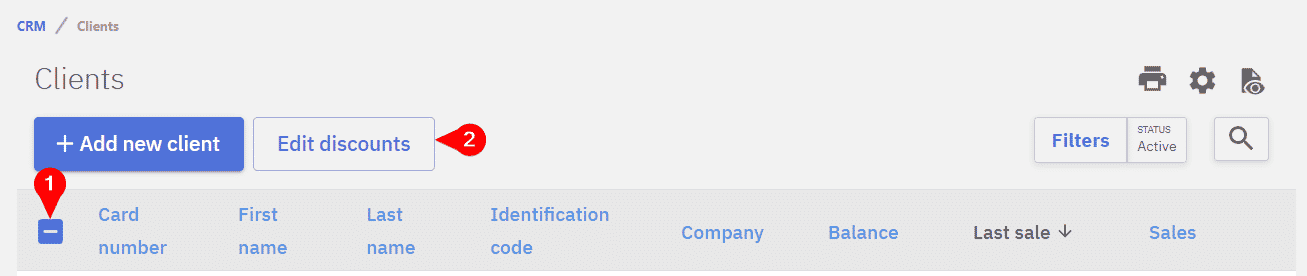
Under “Edit discounts” new discounts can be added and old discounts can be removed for all the selected clients
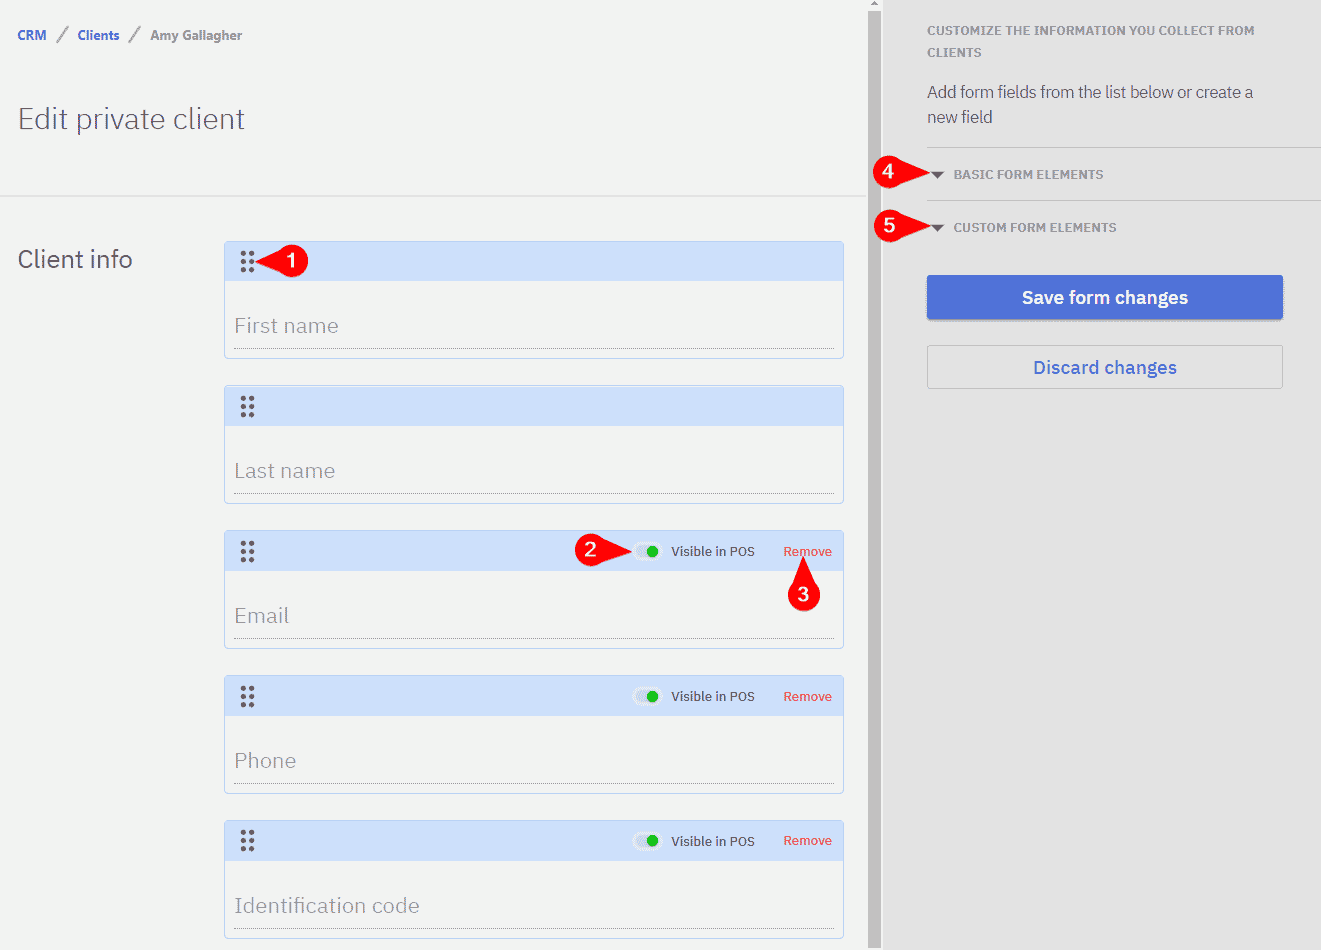
Form field editor
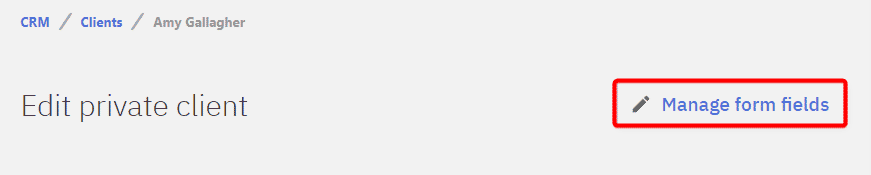
When opening up an existing client or creating a new one form field editor can be opened by clicking Manage form fields. Business clients and private clients have different form field editors and predefined basic form elements.
New fields can be added by dragging, the order which the fields appear in can also be changed by dragging them.
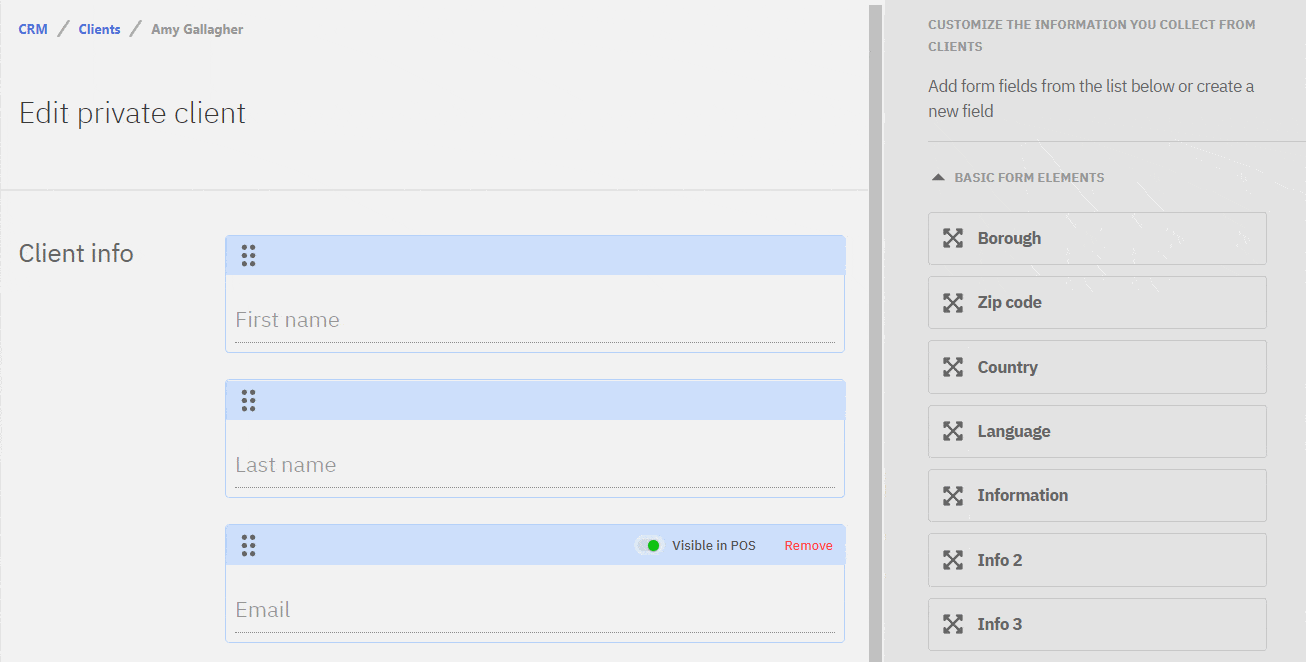
1 – Dragging button to change the order of fields
2 – Visible in POS toggle, information that shouldn’t be shown in POS can be hidden
3 – Button to remove a field
4 – Selection of predefined form elements
5 – Option to create custom form elements
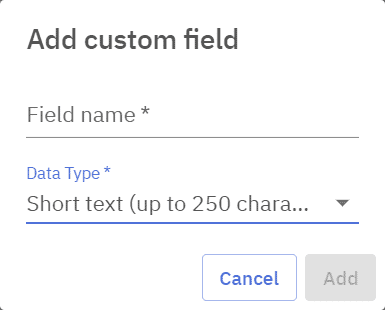
Creating a custom form element
Custom form elements can be created by selecting Custom form elements, then Add custom field.
Then a name for the custom field can be set along with the data type for the field. After adding the created field appears under Custom form elements and can be dragged to the form.