POS panel buttons
Buttons for CC5 POS and Windows POS have to be created separately. Button/panel creation menu is located under Settings and POS Panel buttons.
POS panels
Two types of panel types exist:
Product panel – This panel is for products and product groups and one POS can have multiple product panels.
Action panel – This panel is displayed as a bar on the bottom of the screen and shortcuts for actions which are normally found under additional actions menu can be added to it. A POS can only have one of this type of panel.
Subpanel – This panel can be linked to other panels via the use of buttons
Creating POS panels
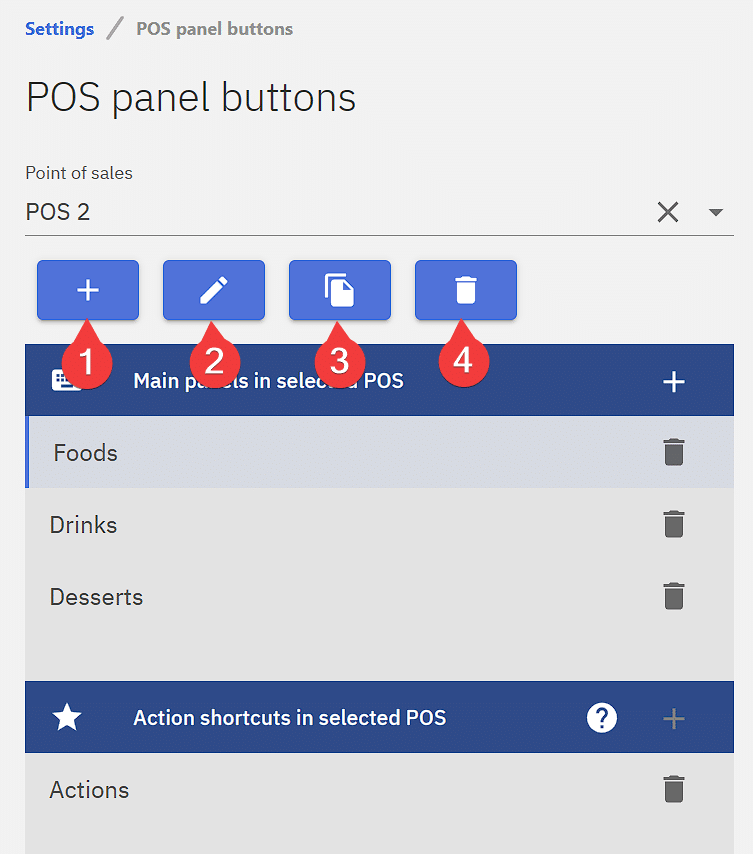
A POS panel can be created by clicking on the +(1), alternatively if panels exist in the Windows POS the copy button(3) can be used to copy them to CC5 POS. Copy button can also be used duplicate existing CC5 POS panels.The edit button (2) is for editing a selected panel and the delete(4) can be used to delete a selected panel. Deleting panels deletes all the buttons on it and the action cannot be reversed.
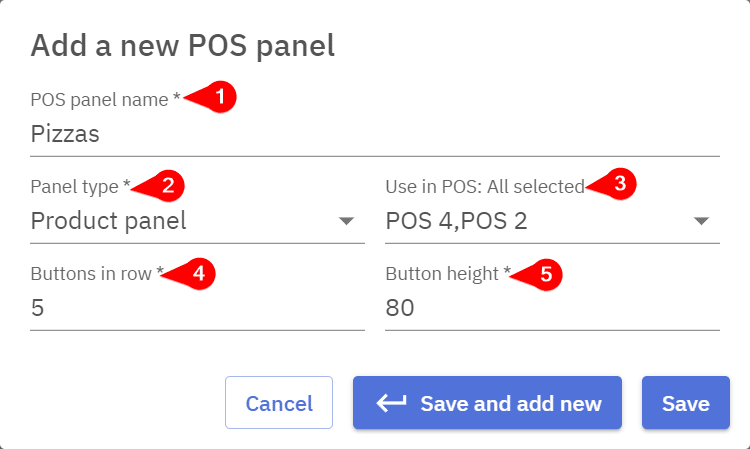
When creating a POS panel it should firstly be named(1), this name will only be displayed to the cashier and should be describe it’s contents. Panel type(2) can either be a Product panel or an Action panel. Multiple POS’ can use the same panel, and POS in which the panel will be visible has to be selected under Use in POS(3). Buttons in row(4) and Button height(5) options are only visible when creating a product panel. Buttons in row determines how many buttons can fit on one row, this depends mostly on the POS device. Phones have less screen space so it’s optimal to use 2-4 buttons in a row, tablets and computers have a larger screen and can fit more buttons in a row. Button height determines the height of each button.
POS buttons
Overall for CC5 POS there are four types of buttons:
1 – Product button, which when clicked on will add a specific product to the invoice
2 – Group button, which when clicked will display all products in a specific group as buttons
3 – Empty button, which can be used to have more control over button placement by introducing empty spaces or gaps between buttons
4 – Action button, which acts as a shortcut for a specific action and can only be added on the Action panel type panels.
Creating buttons
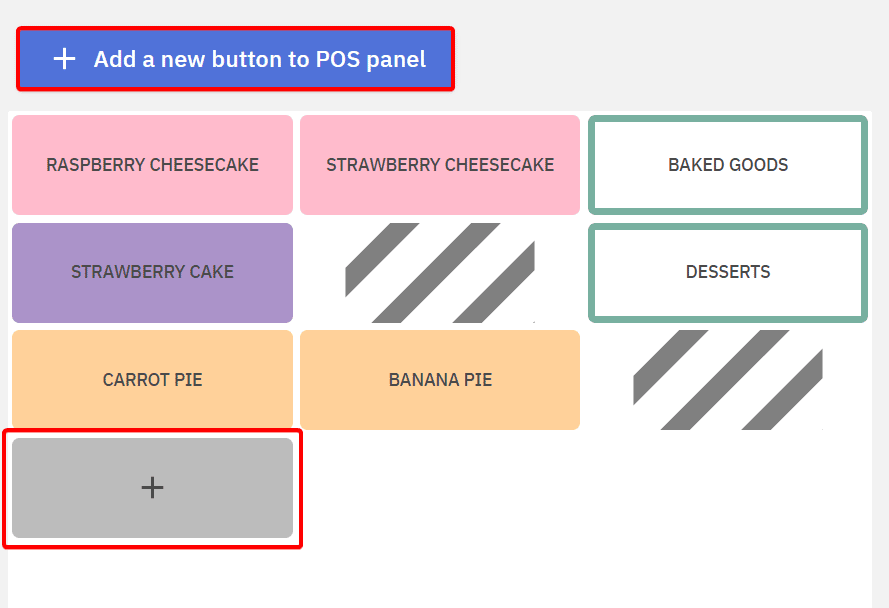
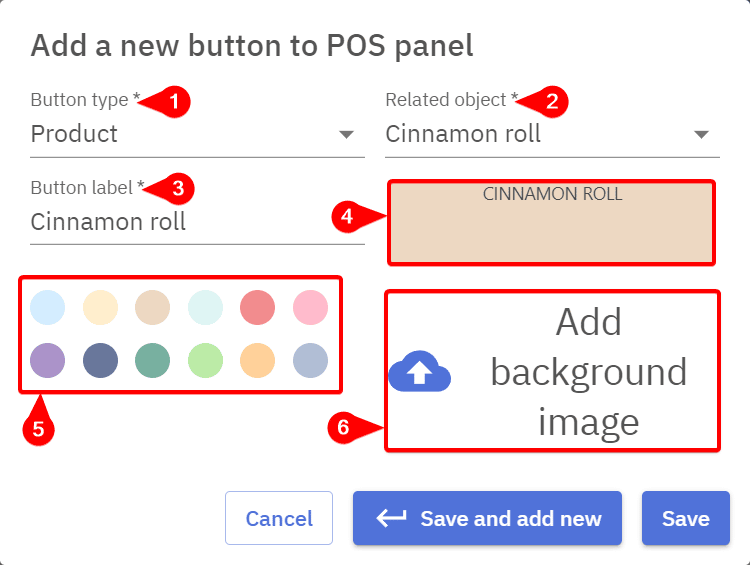
Menu to access button creation for product panels can be opened by selecting the product panel to which the button will be added, then clicking either the + or Add a new button to POS panel.
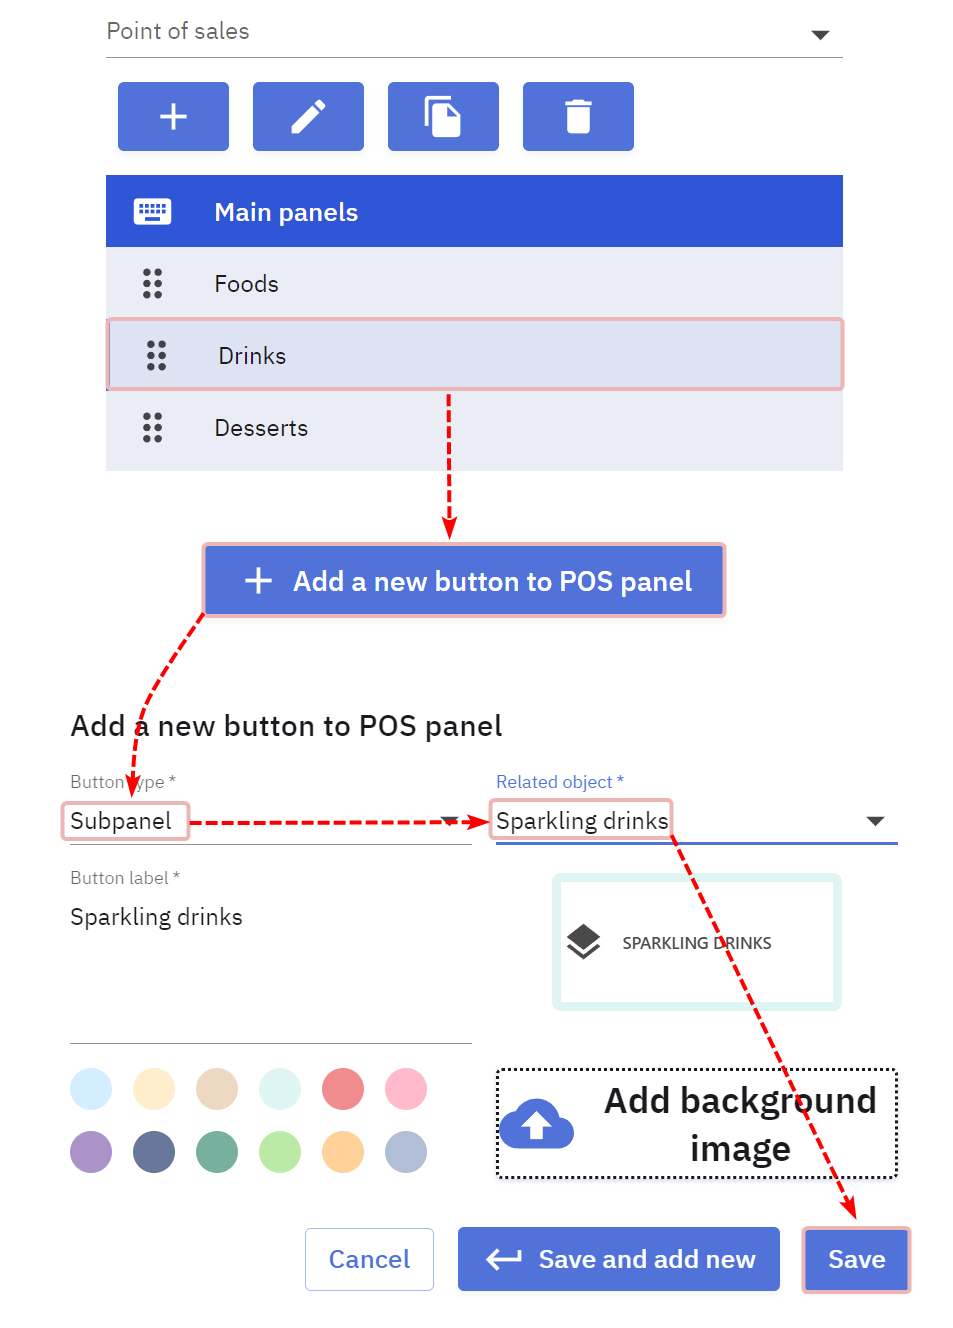
1 – A selection between different types of buttons
2 – Product/group the created button will be connected to
3 – Button label is useful when the name of the product/group is too long to fit on the button, this will only be displayed to the cashier
4 – Button preview, product buttons are filled, group buttons are outlined
5 – Option to choose a colour for the button
Product buttons do not have to be made for all the products, it’s good practice to create separate buttons for products that are sold often. For products that are not sold frequently a group button will suffice. Not every product has to have a product button but all products should be accessible via group buttons to rely less on product search function.
Button colours and empty buttons should be used to position buttons logically so they would be easier to navigate.
Creating action buttons
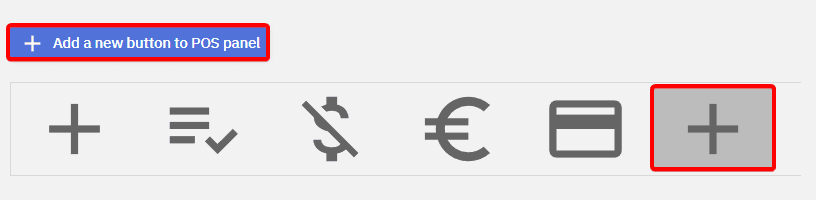
Action buttons can be created by selecting the action panel and clicking either the + or Add a new button to POS panel.
From there the action can be selected.
The buttons will not appear in the POS automatically and for that the data has to refreshed. This can be done by logging in, selecting “Actions”, “POS” and “Refresh data”.
FAQ – Frequently asked questions
Configuring subpanels
Creating a subpanel
For creating a subpanel follow the next graph:
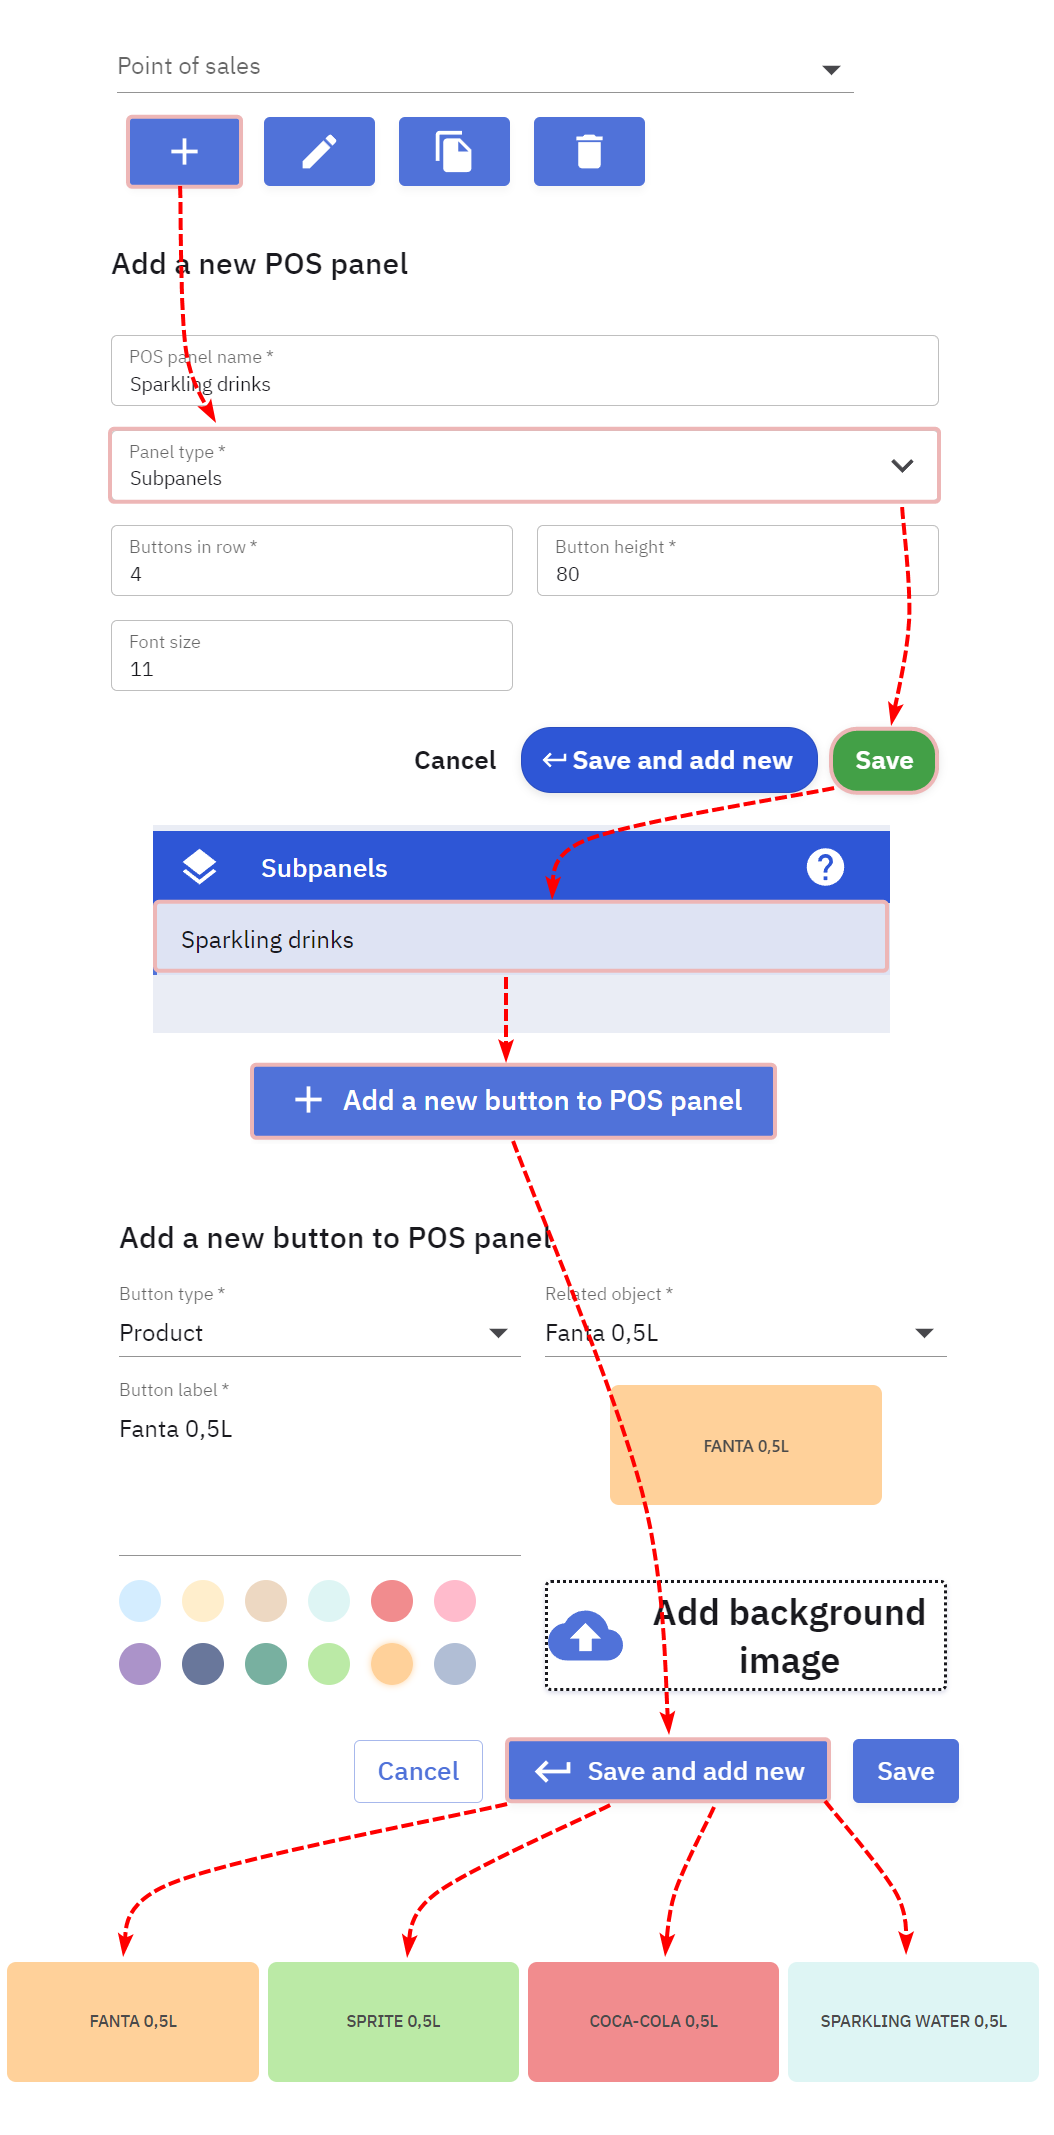
Creating a button to link the newly created subpanel
Final step is to create a link for the subpanel to an existing panel.