Products
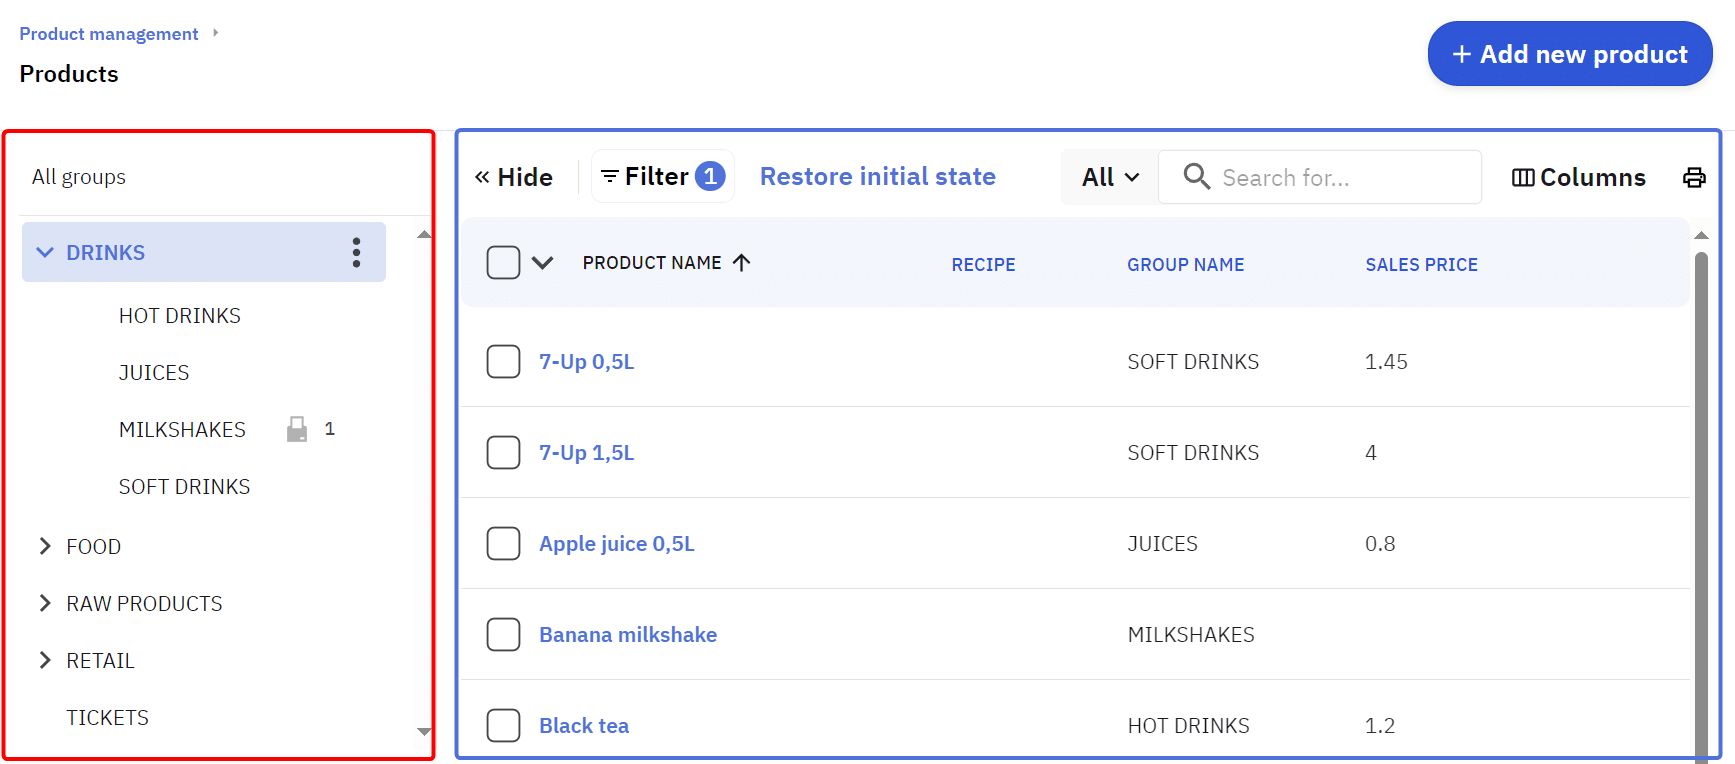
The products view is divided into two parts—on the left is the product groups view (in red), and on the right is the product list view (in blue).
Product Groups
Product groups (groups, categories) allow products to be categorized in the program. A logical and understandable product group tree is important and simplifies the use of the program.
Actions with Product Groups
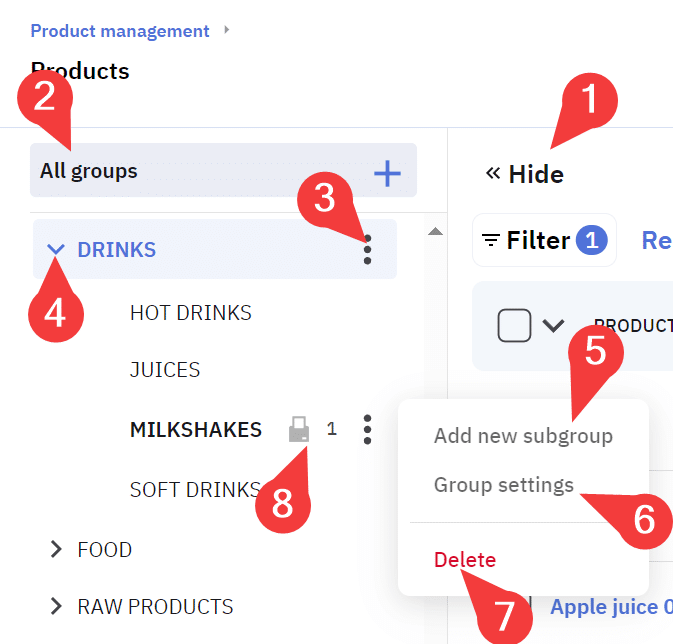
- Allows you to close the product groups view to leave more space for the product list on the right
- Selects all product groups in the filter, displaying products from all groups in the product list on the right
- Opens additional options for the group
- Opens the product group and displays subgroups (only possible if the product group has subgroups)
- Allows creating a subgroup under the respective product group
- Allows modifying the product group settings such as name, sales points, and order printers where the products of this group are printed to
- Allows deleting the product group (if there are products in the group, the program will ask to move the products to another group before deletion)
- Displays how many order printers have been selected for a group
Adding a New Product Group
To add a new main group, click the + button in the All groups. To add a subgroup to an existing product group, click the the 3 dots and then Add new subgroup on the line of the respective product group.
First, give a name to the group being created. Then, if necessary, select the order printer(s) if the products in this group need to be sent to any order printer (usually kitchen and bar printers are used in catering), and set the sales points where the products added to the group can be sold.

From the POS Panel tab, you can add a button for the group or buttons for the products in the group to the POS panel. This is not mandatory and can be done separately later.
Product List
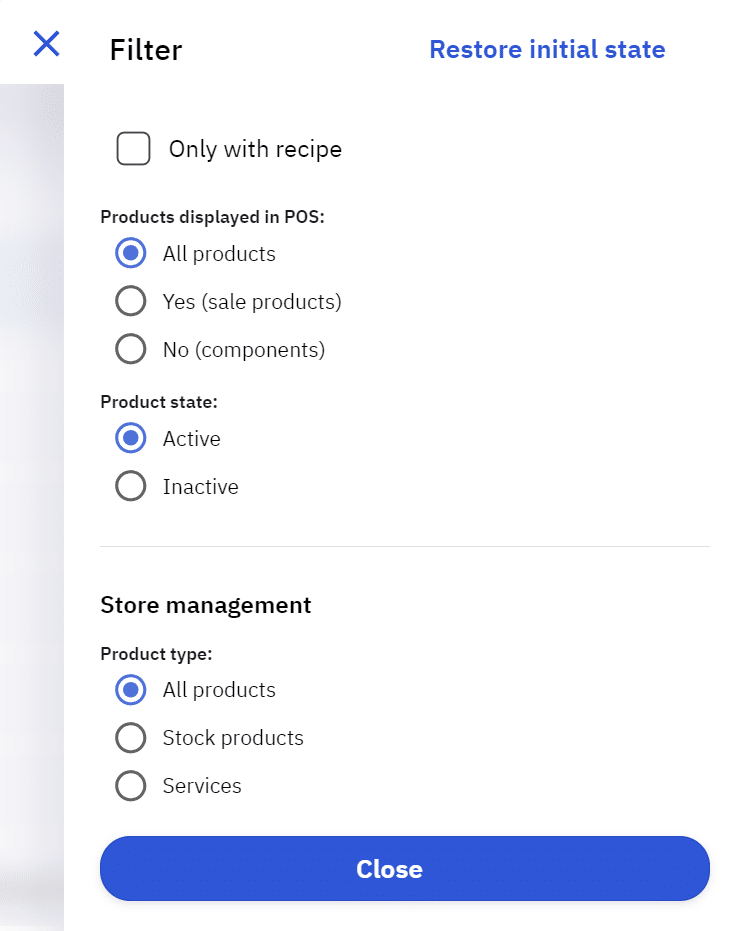
In the product list, you can choose to see the products or components of all groups. Filters and search are located in the table header. By clicking Filter, you can select which parameters of products are displayed in the table. Currently active filters are displayed on the right. The search operates within the previously selected filters.
Adjusting the List View for Products and Components
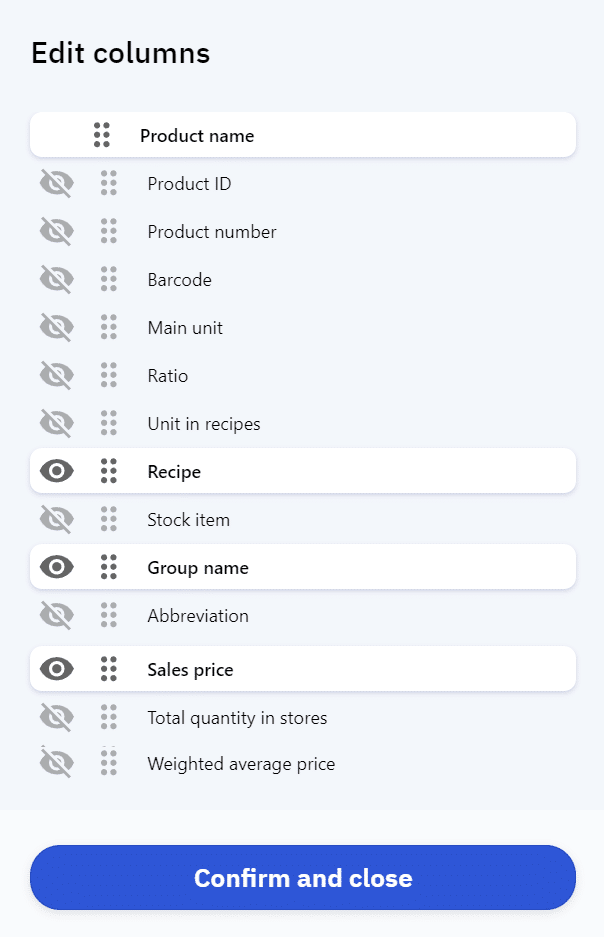
You can adjust the product table view to your preference. Click on Columns and open  or close
  the eye icon in front of the respective information, depending on whether you want to see the column with that information on your screen or not, and in which order. Changing the order works by dragging.
By clicking on the column headers, you can always sort the respective column from largest to smallest or vice versa.
Adding and Managing Products
To add a new product, press the Add New Product button at the top left of the products table.
To add a new product, you need to fill in at least the fields marked with an asterisk, but you can also add other necessary information immediately.
To quickly add similar products, use the button: Save and Add New.
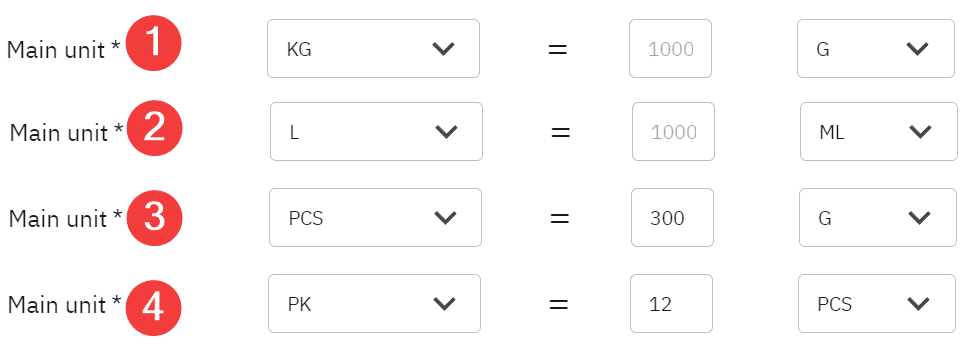
Configuring the Form
To make creating products clearer and faster, it is possible to hide unnecessary fields; for example, if the barcode function is not used, it does not need to be visible. To configure the fields, press the Configure Form button at the top center. Then a form editing window opens on the right.

You can also copy products by clicking on the Copy icon  on the right side of the row of a similar product in the list. Then a copy of the respective product is created, and the parameters of the newly created product open, where you can change the product name, etc.
Adding and Managing Components
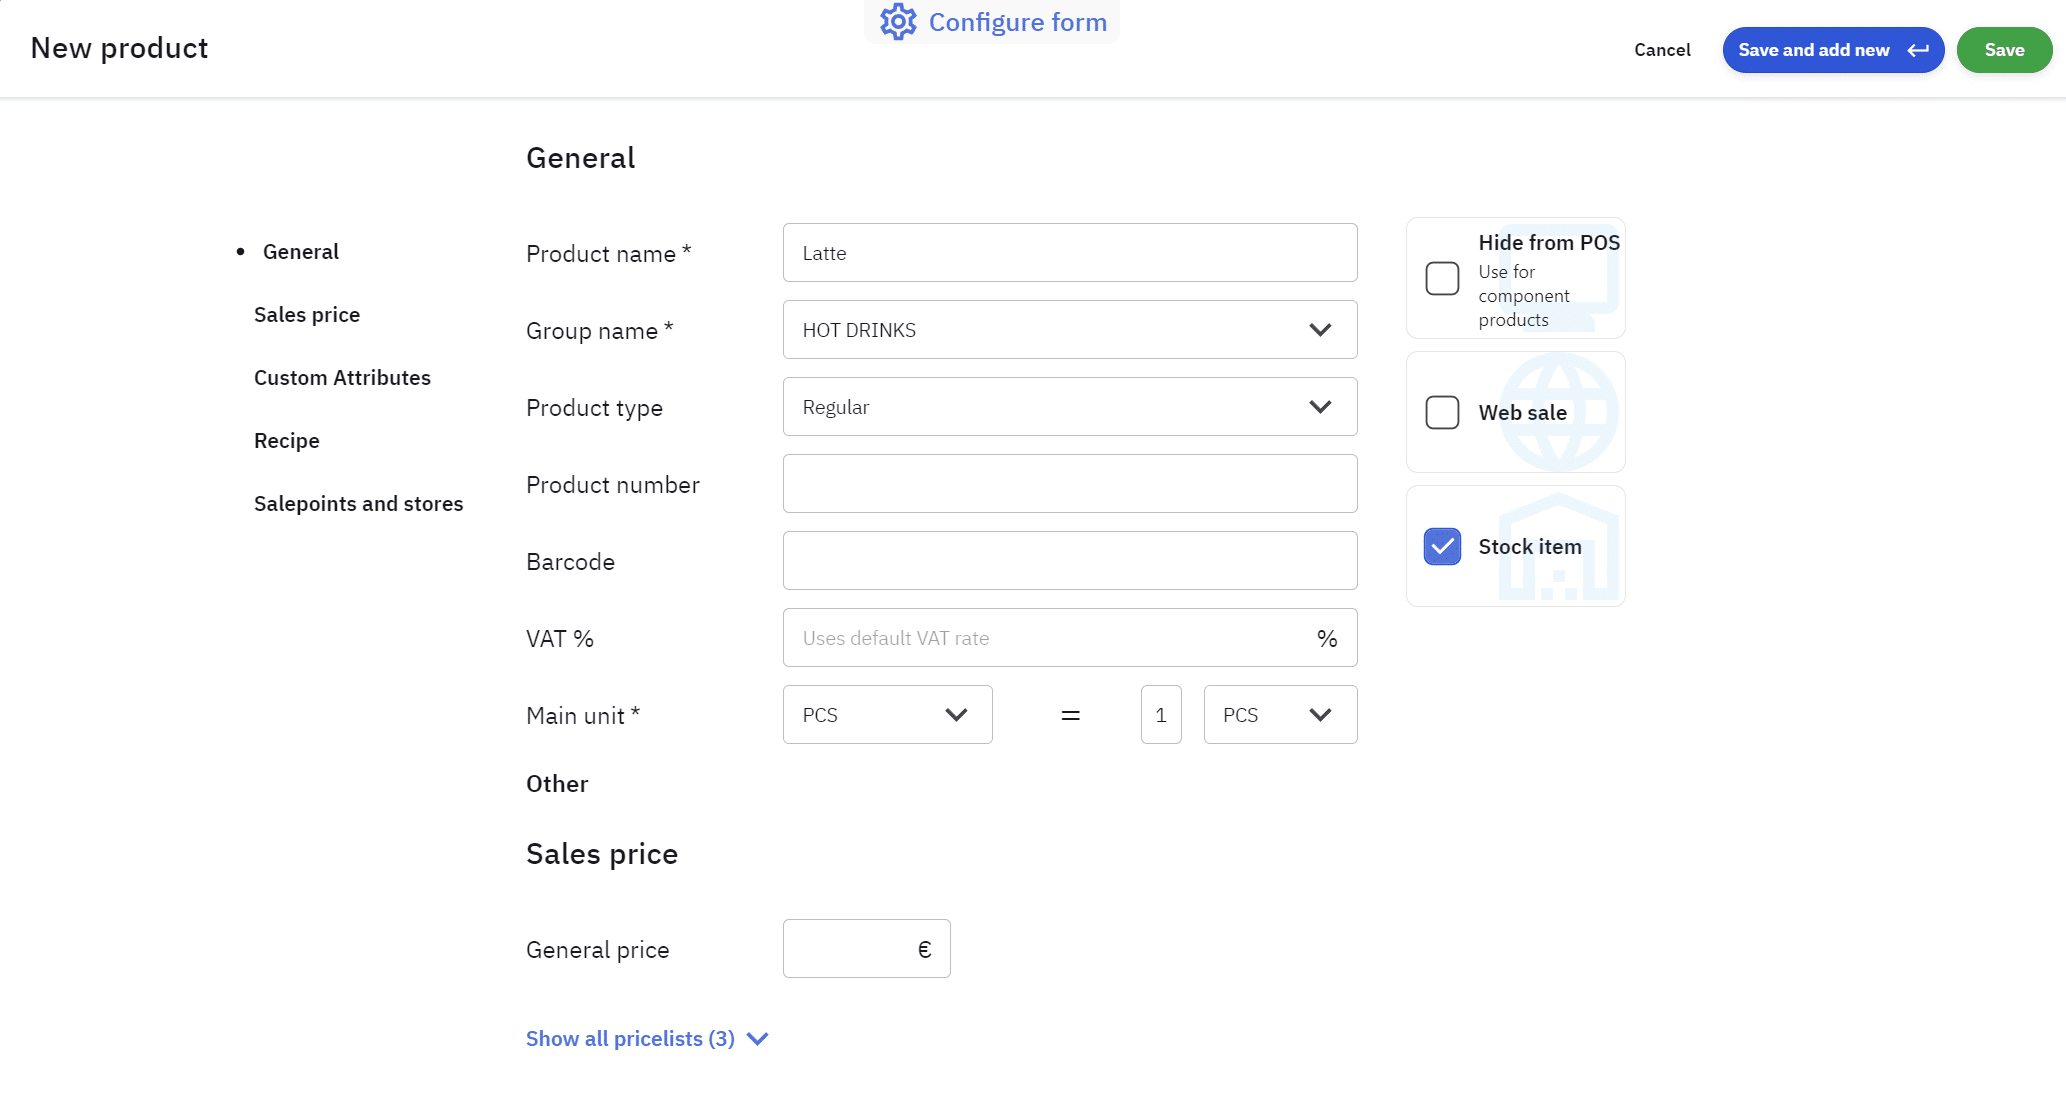
Components are created similarly to sales products via the Add New Product button. The difference here is that for a component, you need to check the box Hide from POS. Components are not sold directly at the POS but are used in sales product recipes.
To add a new product, you need to fill in at least the fields marked with an asterisk, but you can also add other necessary information immediately.
The difference with a regular sales product is that for a component, it is important to specify the base units and measurement units.
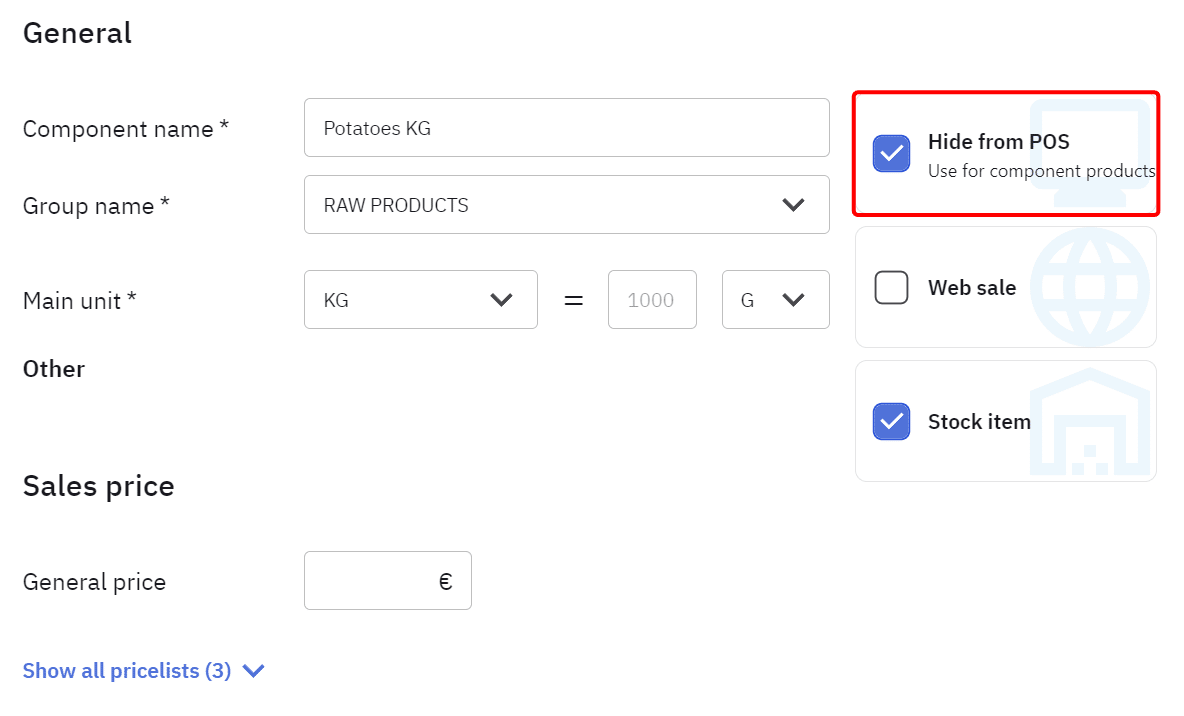
Some common unit relations and explanations:
1 – Goods to stock in KG, recipes use G, for example, fruits and vegetables, meat
2 – Goods to stock in L, recipes use ML, various oils, liquids
3 – Goods to stock in pieces (PCS), recipes use G, the ratio determines how many G are in one piece (PCS), e.g., a 300G pack of mayonnaise; we take a pack of mayonnaise into the warehouse, in recipes we use grams
4 – Goods to stock in packages (PK), recipes use pieces (PCS), the ratio determines how many pieces (PCS) are in one package (PK), e.g., a carton of eggs; we take a carton into the warehouse, in recipes we use individual eggs
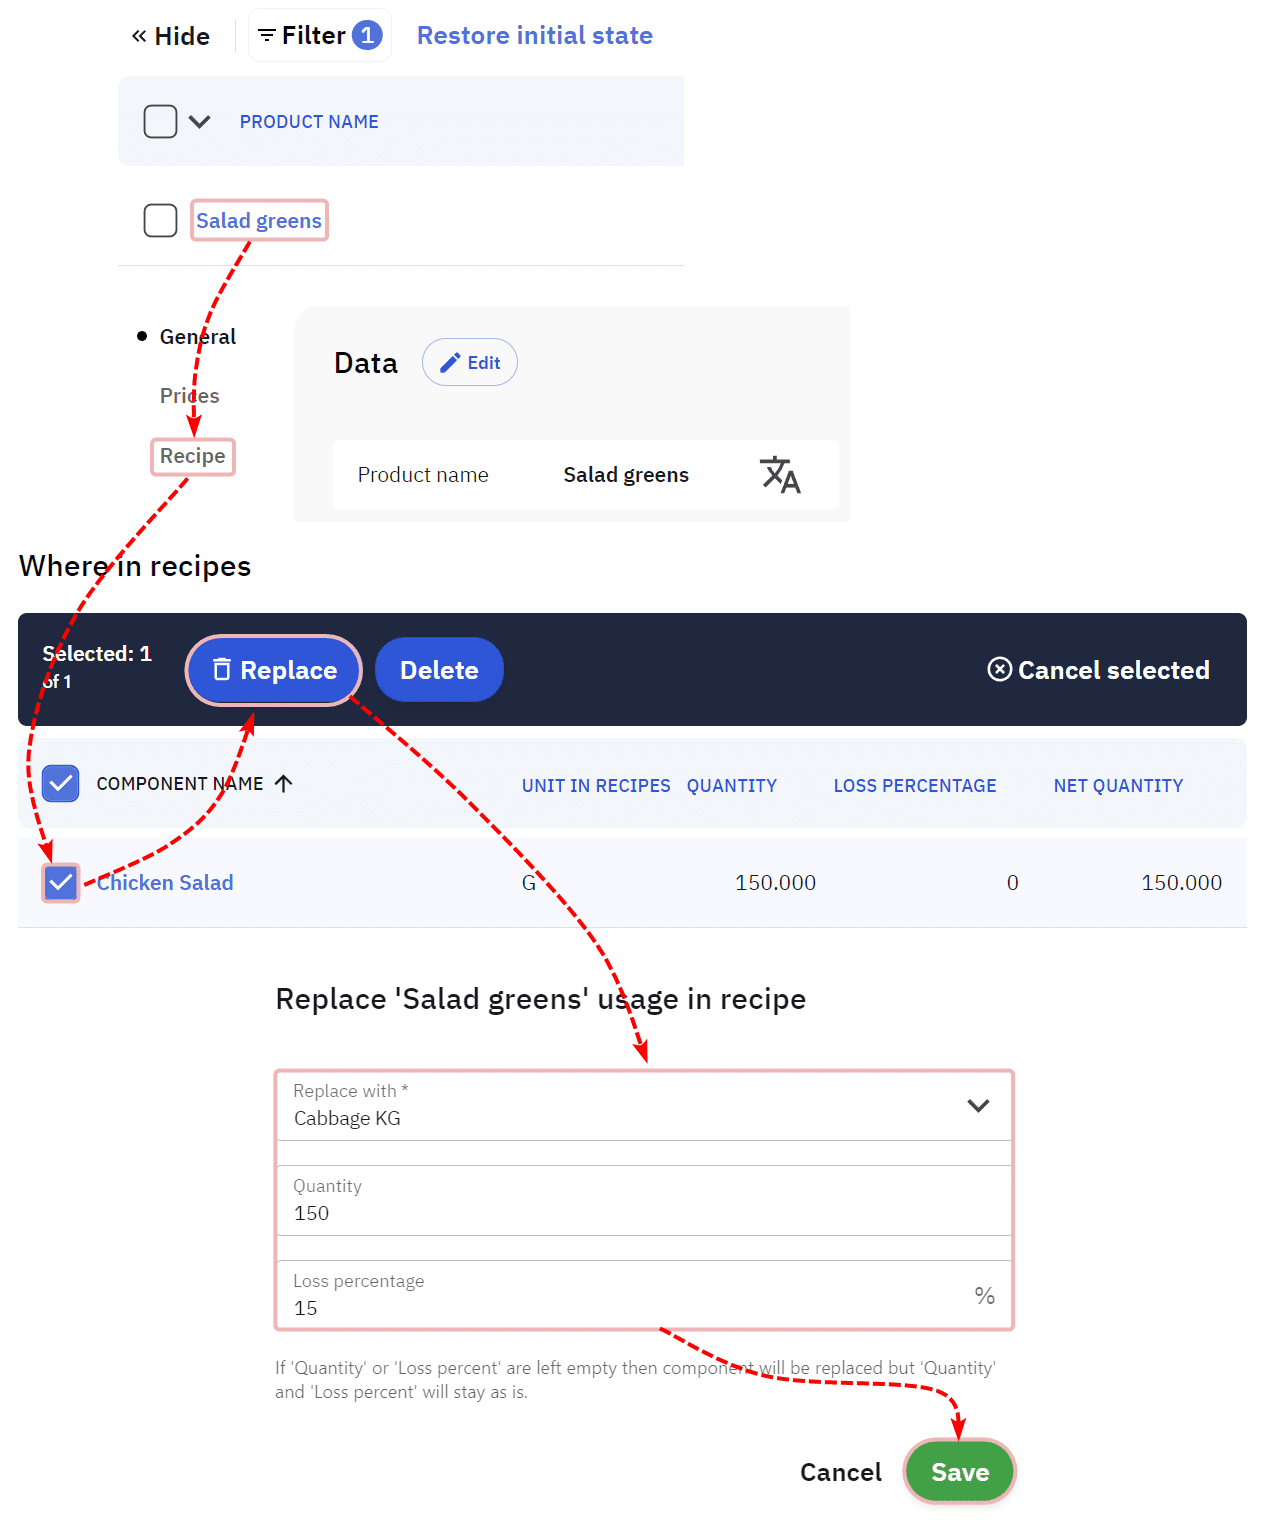
Replacing and Deleting Components in Recipes
Components can be replaced and deleted in recipes on the product card, with the help of the following diagram:
Recipes
Recipes are useful when a single product is sold but different items need to be subtracted from the warehouse, for example, when selling a Chicken salad, the components that make up the salad should be deducted from the warehouse.
It’s most convenient to add the recipe while creating the sales product; therefore, it’s advisable to create component products beforehand. In this case, you can immediately create recipes when creating the product.
However, if the products are already created, it’s not a problem; the recipe can be added later from the product card.
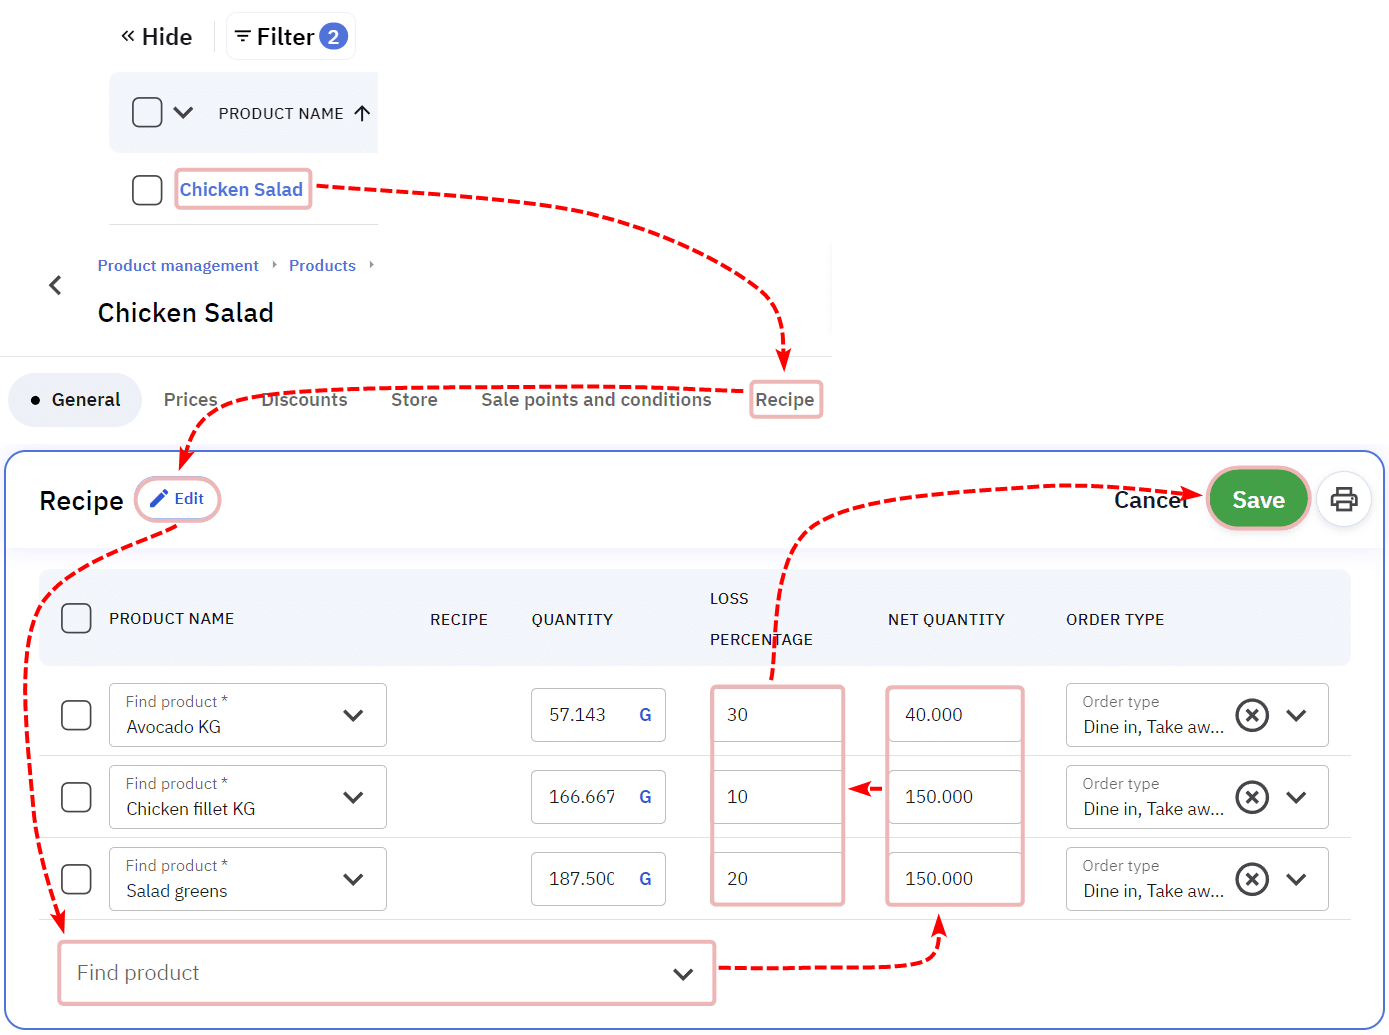
Quantity – the quantity of the product that will be deducted from the warehouse
Loss Percentage – the assumed percentage of the product that is lost during the preparation process (e.g., peeling potatoes)
Net Quantity – the quantity of the product that ends up on the plate
Product Card
The product card is where all the information related to a product is consolidated. You can open the product card by clicking on the product name. Depending on the settings, not all the fields mentioned below may be visible.
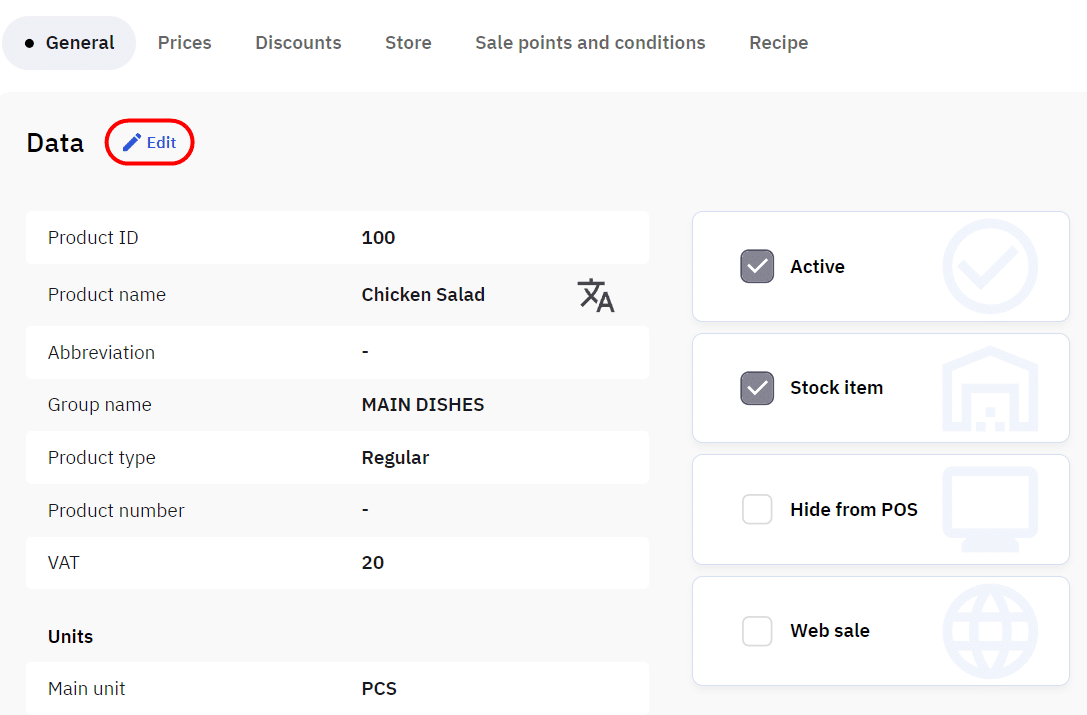
General
The General tab contains overall information about the product. Here you can change general information related to the product, such as whether the product is active, whether it is displayed in the POS, or how stock accounting is handled. You can modify the product information by clicking on the Edit tab.
Prices
The Prices tab displays detailed price information of the product, such as the sales price or the product’s net value. In the case of a recipe product, the price per base unit is displayed. You can change sales prices by clicking the pencil icon on the price list.

Discounts
The Discounts tab shows all product-specific discounts applicable to the product. From here, you can add or remove discounts for the product.
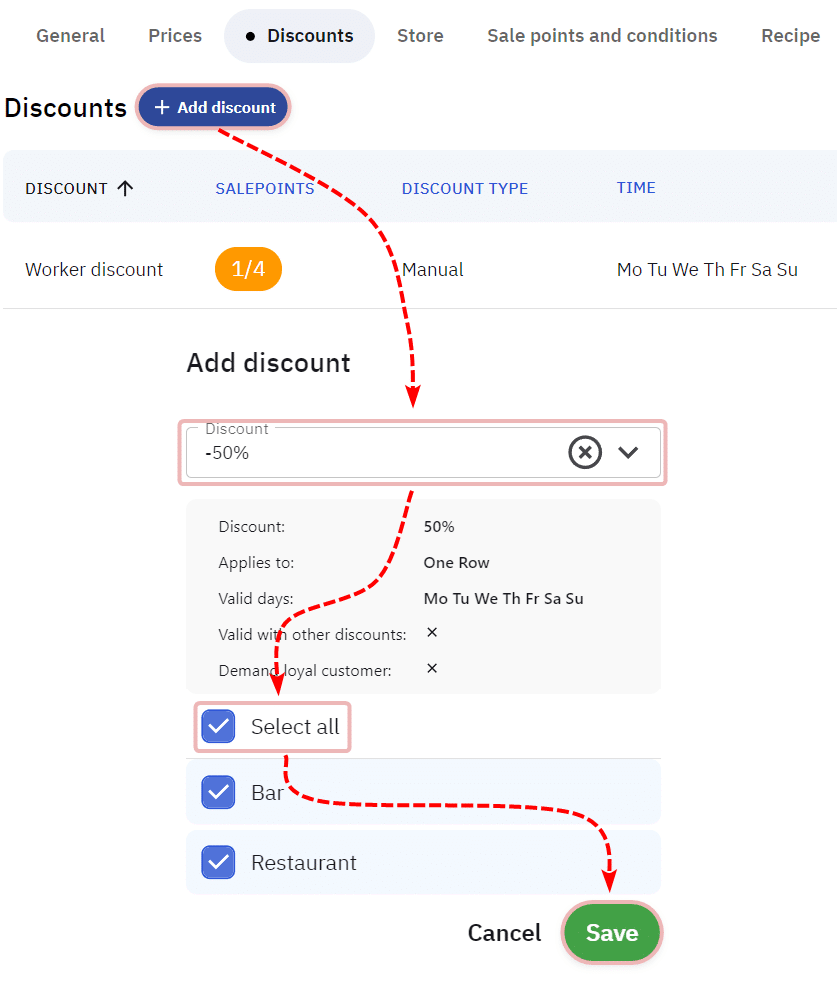
Note: Only product-specific discounts are displayed in the list. If the discount type is Applies to all products, it will not be shown in the list.
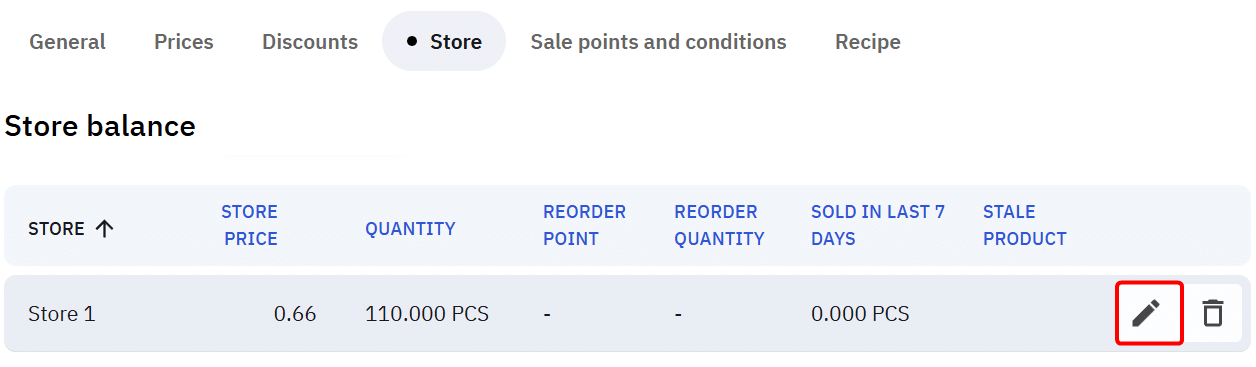
Stock
The Stock tab contains all warehouse information related to the product, showing the current stock level and sales data from the last week. You can also adjust the stock level of a single product and set reorder limits from here.
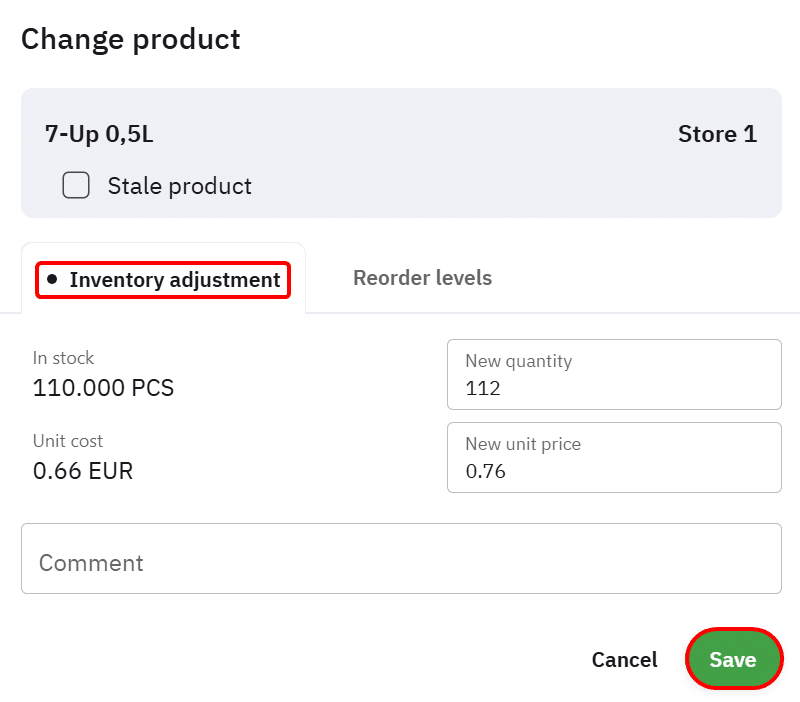
Inventory Adjustment
Under Stock Adjustment, you can create a mini-inventory where you can set a new stock level or warehouse price for the product.
Note: Adjusting the stock level creates an inventory with the current stock time, which may prevent general inventories from being made! If a general inventory has been counted but not yet entered, you must enter that inventory before adjusting a single product!
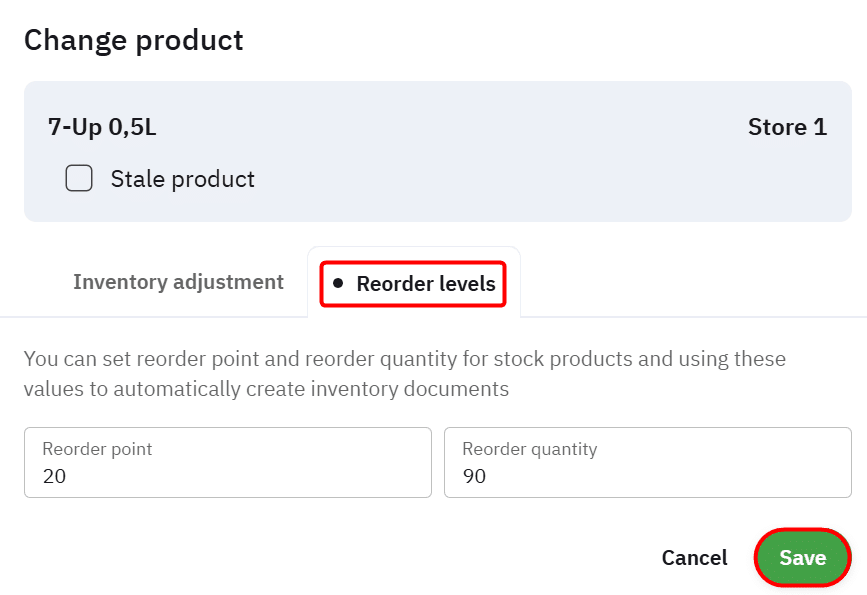
Reorder Limits
Under Reorder Limits, you can set lower limits for products, which allows you to easily create a delivery note to reorder the product.
Supplier Actions
In addition to the stock level, you can manage supplier relations on the Stock page. This is useful, for example, if you are using Telema or another electronic delivery note interface and an error is made in creating the supplier relation.
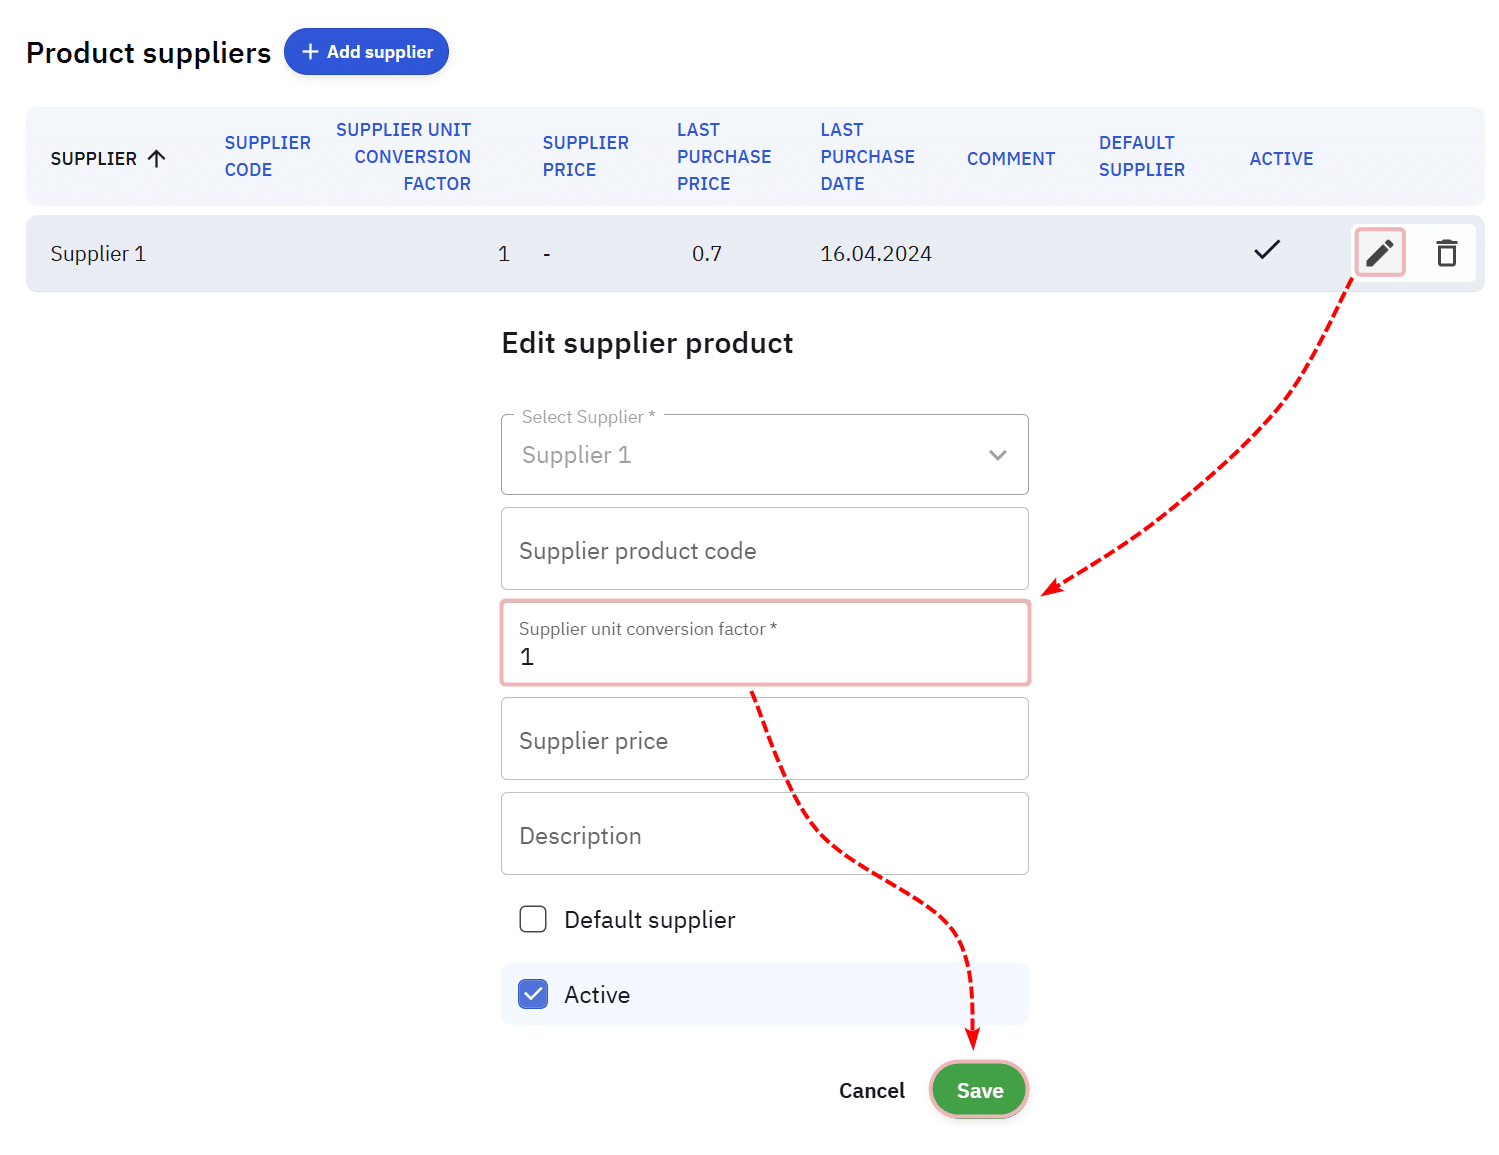
Note: Changing the supplier relation does not change already existing delivery notes.
Sales Points and Conditions
This tab displays information about sales points. If more than one sales point is used, you can configure in which sales points the product is sold. In addition to the sales point, you can add sales restrictions to the product here.
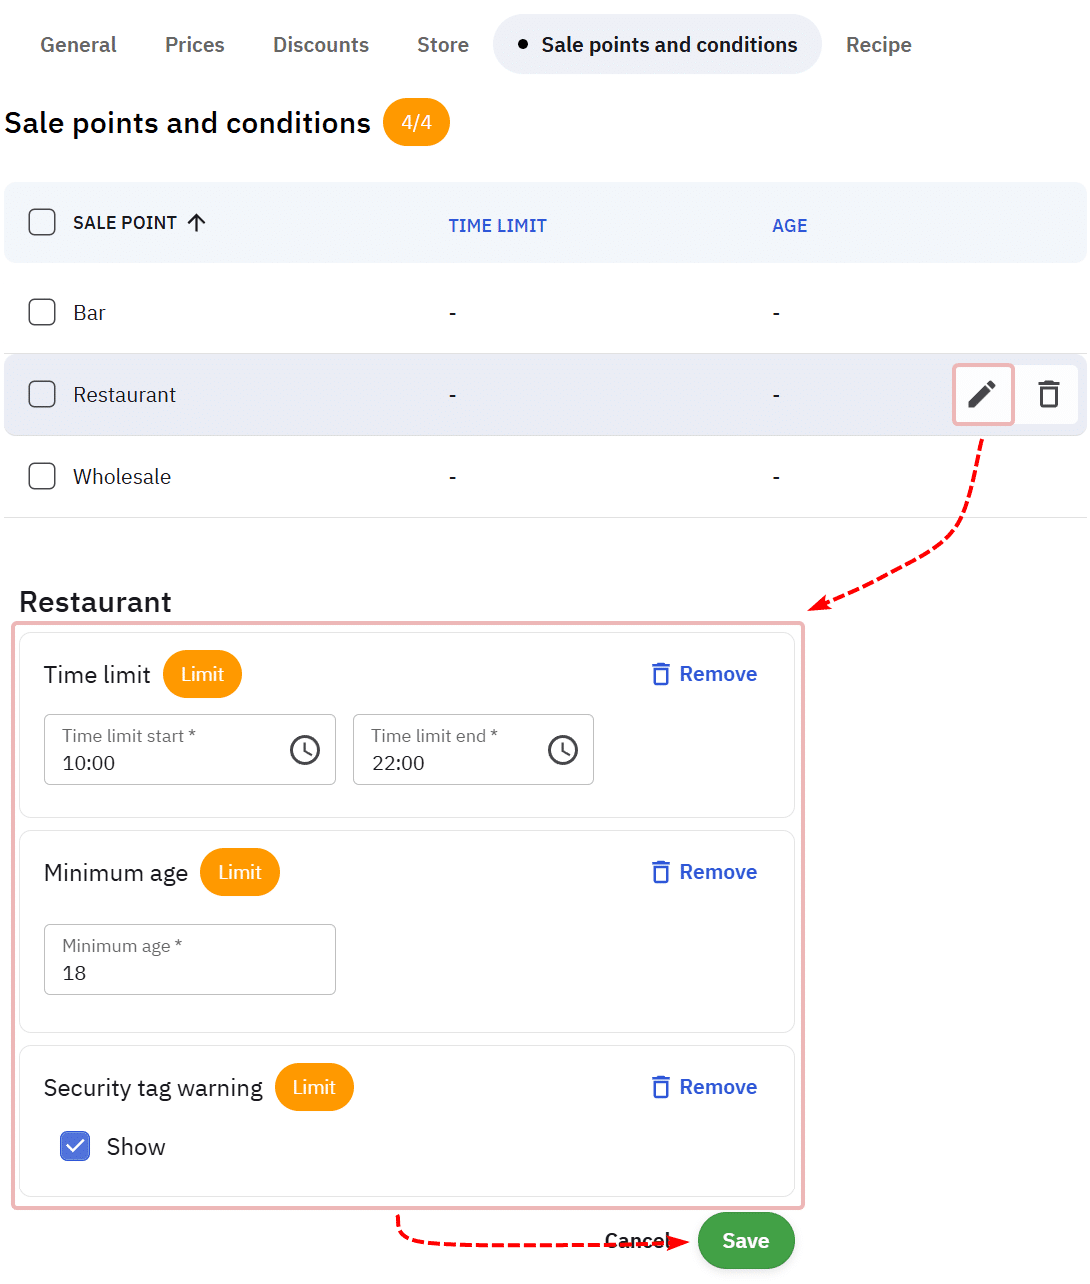
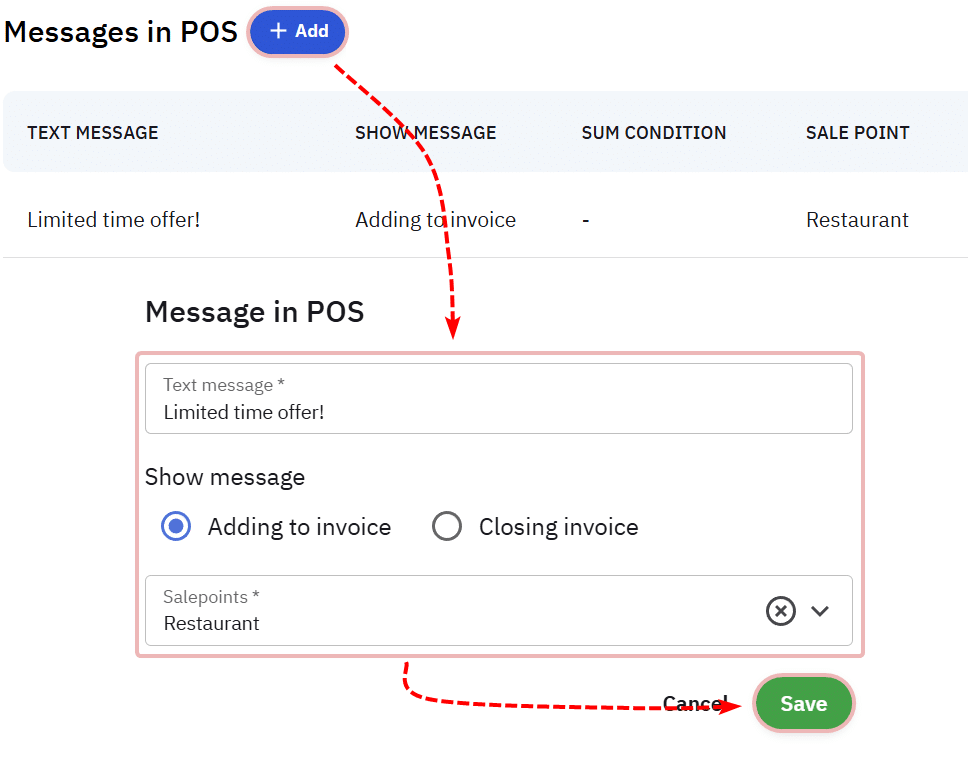
Finally, you can set messages for products that are displayed according to the settings either when the product is added to the invoice or when the invoice is completed.
Recipe
The Recipe field allows for recipe management. You can find more information about recipes in the Recipes section.
Bulk Actions with Products
In the product list, you can perform various bulk actions with products. By checking the products and clicking the Change Product Group button, you can move products between groups. Additional options are under the More button.
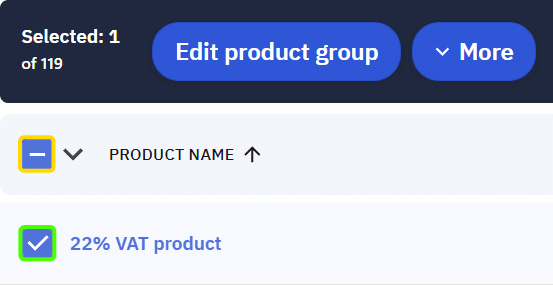
By checking the top box (yellow), all products are selected. By checking the box before the product name (green), only that product is added to the selection.
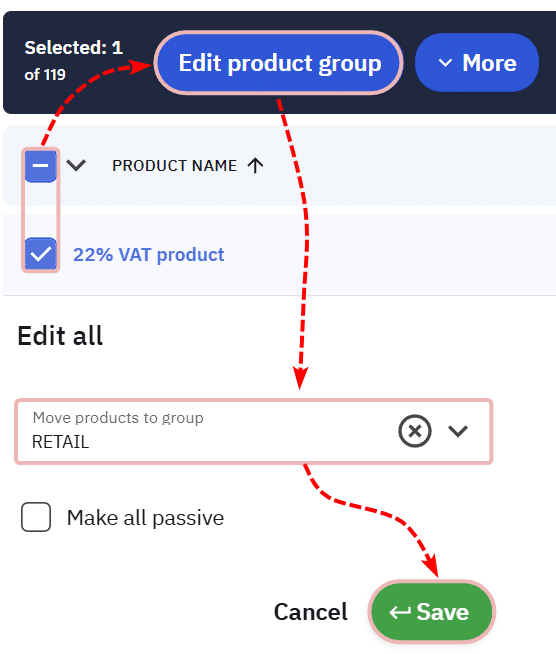
Changing Product Group
First, check the products, click Change Product Group, and select the new product group.
Deactivating a Product
If you wish to remove a product from sale, you need to deactivate it; then, by default, it is no longer displayed in the back office or POS.
Note: It is not possible to completely delete a product.
Note: If the product has a stock balance, an inventory is automatically created that resets the stock balance to zero. This may prevent the entry of already counted but unentered inventories into Compucash. Before deactivating the product, make sure that counted inventories are entered and accepted.
There are two ways to deactivate a product:
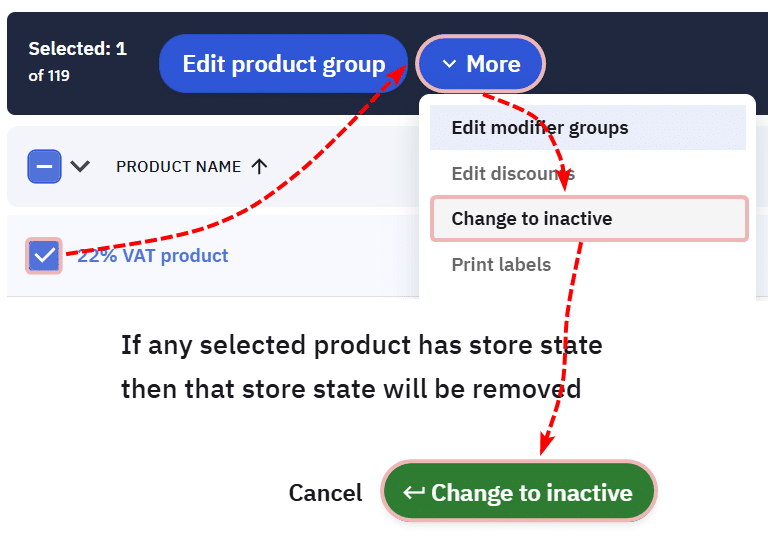
Deactivation
Select the products, click Deactivate under the More option.
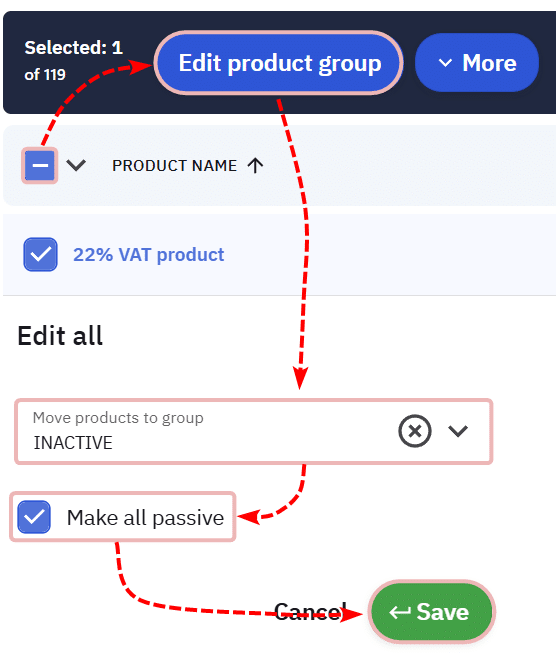
Deactivation and Moving to Group
Select the products, click Change Product Group, choose the product group created for inactive products, and check the box Deactivate All. Then all selected products are moved to a separate product group and deactivated.
Activating a Product
The process of activating a product is similar to deactivating it. First, you need to display inactive products using the filter; then you can select them and activate by clicking the Activate button.

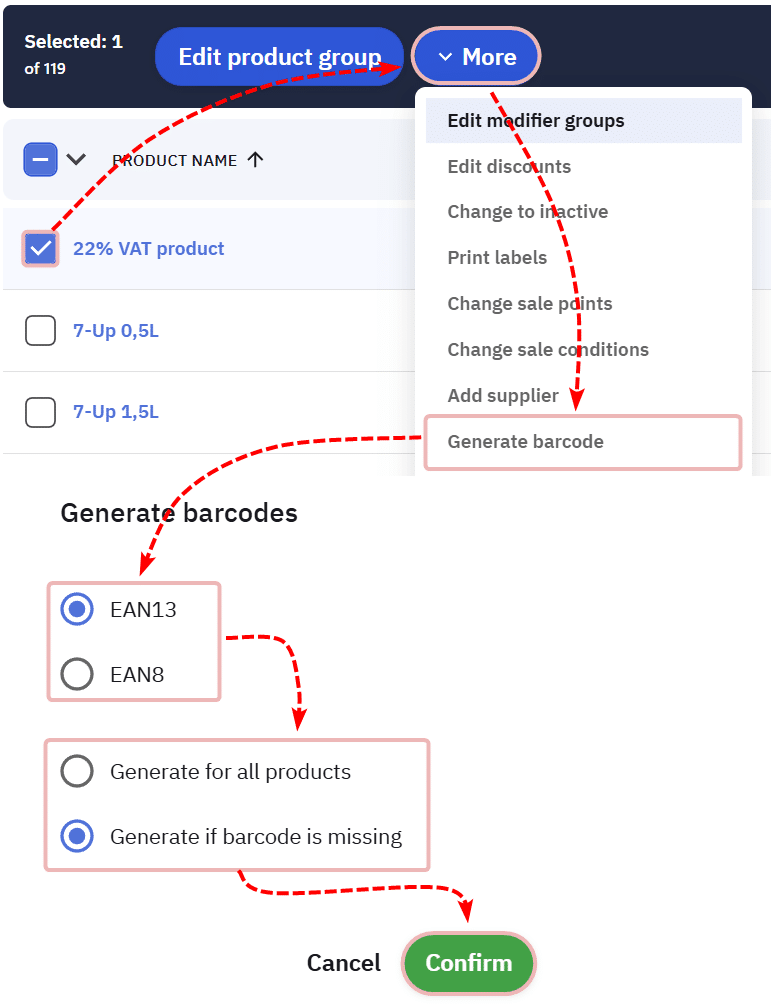
Generating a Barcode
Compucash allows you to generate an EAN barcode for a product through bulk actions.
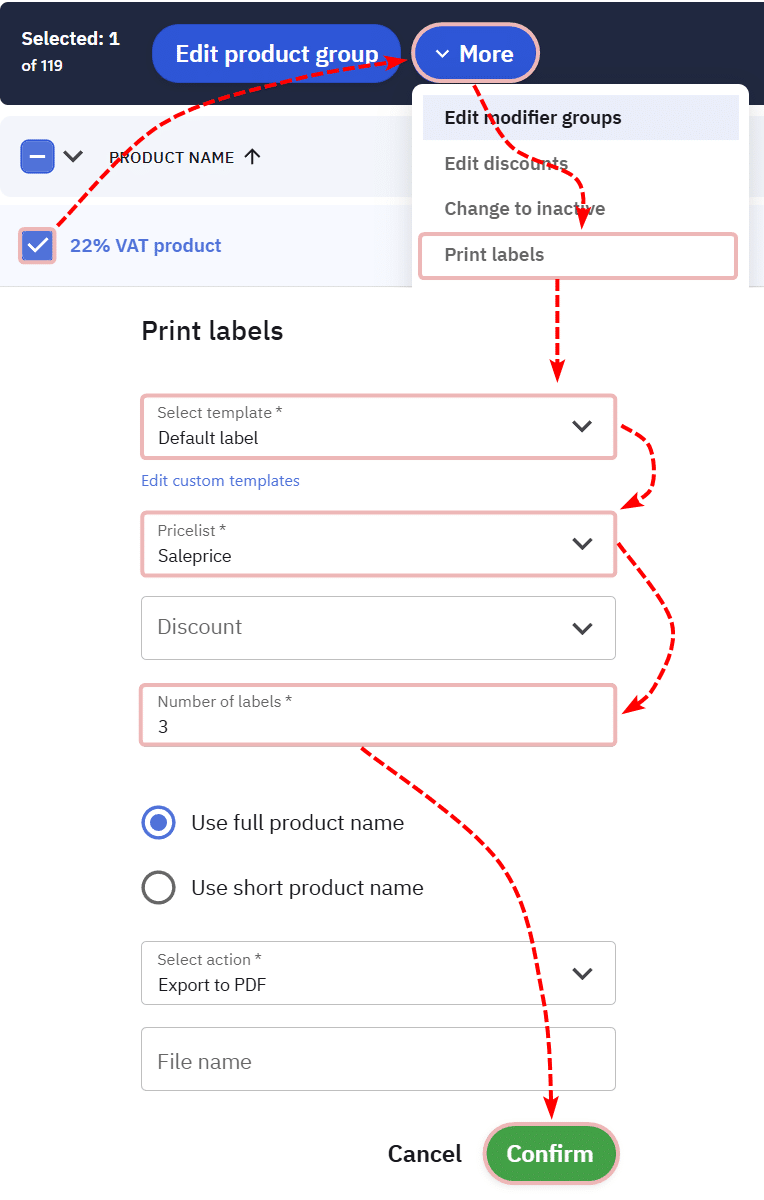
Printing Labels
It’s easy to print price tags from the product list.